1
2
3
4
5
6
7
8
9
10
11
12
13
14
15
16
17
18
19
20
21
22
23
24
25
26
27
28
29
30
31
32
33
34
35
36
37
38
39
40
41
42
43
44
45
46
47
48
49
50
51
52
53
54
55
56
57
58
59
60
61
62
63
64
65
66
67
68
69
70
71
72
73
74
75
76
77
78
79
80
81
82
83
84
85
86
87
88
89
90
91
92
93
94
95
96
97
98
99
100
101
102
103
104
105
106
107
108
109
110
111
112
113
114
115
116
117
118
119
120
121
122
123
124
125
126
127
128
129
130
131
132
133
134
135
136
137
138
139
140
141
142
143
144
145
146
147
148
149
150
151
152
153
154
155
156
157
158
159
160
161
162
163
164
165
166
167
168
169
170
171
172
173
174
175
176
177
178
179
180
181
182
183
184
185
186
187
188
189
190
191
192
193
194
195
196
197
198
199
200
201
202
203
204
205
206
207
208
209
210
211
212
213
214
215
216
217
218
219
220
221
222
223
224
225
226
227
228
229
230
231
232
233
234
235
236
237
238
239
240
241
242
243
244
245
246
247
248
249
250
251
252
253
254
255
256
257
258
259
260
261
262
263
264
265
266
267
268
269
270
271
272
273
274
275
276
277
278
279
280
281
282
283
284
|
# Extensions
[TOC]
On top of the base theme provided by `doxygen-awesome.css`, this repository comes with Javascript extensions that require additional setup steps to get them running.
The extensions require customizations in the header HTML template.
This is how you can create the default template with Doxygen:
1. Create default header template:
```sh
doxygen -w html header.html delete_me.html delete_me.css
```
2. Reference the template in your `Doxyfile`:
```
HTML_HEADER = header.html
```
[More details on header customization](https://www.doxygen.nl/manual/customize.html#minor_tweaks_header_css)
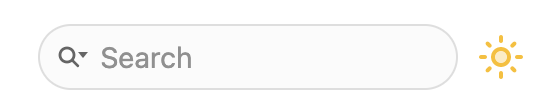
## Dark Mode Toggle {#extension-dark-mode-toggle}
Adds a button next to the search bar to enable and disable the dark theme variant manually:
<div class="darkmode_inverted_image bordered_image">
{width=250px}
</div>
### Installation
1. Add the required resources in your `Doxyfile`:
- **HTML_EXTRA_FILES:** `doxygen-awesome-darkmode-toggle.js`
- **HTML_EXTRA_STYLESHEET:** `doxygen-awesome-sidebar-only-darkmode-toggle.css`
<em>(ONLY required for the sidebar-only theme variant!)</em>
2. In the `header.html` template, include `doxygen-awesome-darkmode-toggle.js` at the end of the `<head>` and then initialize it:
```html
<html>
<head>
<!-- ... other metadata & script includes ... -->
<script type="text/javascript" src="$relpath^doxygen-awesome-darkmode-toggle.js"></script>
<script type="text/javascript">
DoxygenAwesomeDarkModeToggle.init()
</script>
</head>
<body>
```
### Customizing
Changing the tooltip of the button:
```js
DoxygenAwesomeDarkModeToggle.title = "Zwischen hellem/dunklem Modus wechseln"
```
Changing Icons. Both Emoji or SVG icons are supported:
```js
DoxygenAwesomeDarkModeToggle.lightModeIcon = '🌞'
// icon from https://fonts.google.com/icons
DoxygenAwesomeDarkModeToggle.darkModeIcon = `<svg xmlns="http://www.w3.org/2000/svg" enable-background="new 0 0 24 24" height="24px" viewBox="0 0 24 24" width="24px" fill="#009793"><g><rect fill="none" height="24" width="24"/></g><g><g><path d="M8.1,14.15C9.77,14.63,11,16.17,11,18c0,0.68-0.19,1.31-0.48,1.87c0.48,0.09,0.97,0.14,1.48,0.14 c1.48,0,2.9-0.41,4.13-1.15c-2.62-0.92-5.23-2.82-6.8-5.86C7.74,9.94,7.78,7.09,8.29,4.9c-2.57,1.33-4.3,4.01-4.3,7.1c0,0,0,0,0,0 c0.01,0,0.01,0,0.02,0C5.66,12,7.18,12.83,8.1,14.15z" opacity=".3"/><path d="M19.78,17.51c-2.47,0-6.57-1.33-8.68-5.43C8.77,7.57,10.6,3.6,11.63,2.01C6.27,2.2,1.98,6.59,1.98,12 c0,0.14,0.02,0.28,0.02,0.42C2.61,12.16,3.28,12,3.98,12c0,0,0,0,0,0c0-3.09,1.73-5.77,4.3-7.1C7.78,7.09,7.74,9.94,9.32,13 c1.57,3.04,4.18,4.95,6.8,5.86c-1.23,0.74-2.65,1.15-4.13,1.15c-0.5,0-1-0.05-1.48-0.14c-0.37,0.7-0.94,1.27-1.64,1.64 c0.98,0.32,2.03,0.5,3.11,0.5c3.5,0,6.58-1.8,8.37-4.52C20.18,17.5,19.98,17.51,19.78,17.51z"/><path d="M7,16l-0.18,0C6.4,14.84,5.3,14,4,14c-1.66,0-3,1.34-3,3s1.34,3,3,3c0.62,0,2.49,0,3,0c1.1,0,2-0.9,2-2 C9,16.9,8.1,16,7,16z"/></g></g></svg>`
```
All customizations must be applied before calling `DoxygenAwesomeDarkModeToggle.init()`!
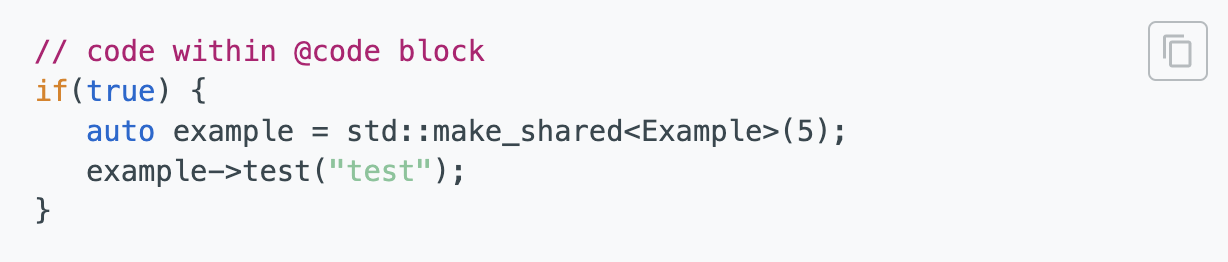
## Fragment Copy Button {#extension-copy-button}
Shows a copy button when the user hovers over a code fragment:
<div class="darkmode_inverted_image bordered_image">
{width=490}
</div>
### Installation
1. Add the required resources in your `Doxyfile`:
- **HTML_EXTRA_FILES:** `doxygen-awesome-fragment-copy-button.js`
- **HTML_COPY_CLIPBOARD:** `NO` required with Doxygen >= 1.10.0
2. In the `header.html` template, include `doxygen-awesome-fragment-copy-button.js` at the end of the `<head>` and then initialize it:
```html
<html>
<head>
<!-- ... other metadata & script includes ... -->
<script type="text/javascript" src="$relpath^doxygen-awesome-fragment-copy-button.js"></script>
<script type="text/javascript">
DoxygenAwesomeFragmentCopyButton.init()
</script>
</head>
<body>
```
### Customizing
The tooltip of the button can be changed:
```js
DoxygenAwesomeFragmentCopyButton.title = "In die Zwischenablage kopieren"
```
The icon can be changed. It must be an SVG:
```js
DoxygenAwesomeFragmentCopyButton.copyIcon = `<svg ...>`
DoxygenAwesomeFragmentCopyButton.successIcon = `<svg ...>`
```
All customizations must be applied before calling `DoxygenAwesomeDarkModeToggle.init()`!
## Paragraph Linking {#extension-para}
Provides a button on hover behind every headline to allow easy creation of a permanent link to the headline:
<div class="darkmode_inverted_image bordered_image">
{width=220}
</div>
Works for all headlines and for many documentation section titles.
### Installation
1. Add the required resources in your `Doxyfile`:
- **HTML_EXTRA_FILES:** `doxygen-awesome-paragraph-link.js`
2. In the `header.html` template, include `doxygen-awesome-paragraph-link.js` at the end of the `<head>` and then initialize it:
```html
<html>
<head>
<!-- ... other metadata & script includes ... -->
<script type="text/javascript" src="$relpath^doxygen-awesome-paragraph-link.js"></script>
<script type="text/javascript">
DoxygenAwesomeParagraphLink.init()
</script>
</head>
<body>
```
### Customizing
The button tooltip can be changed:
```js
DoxygenAwesomeParagraphLink.title = "Abschnitt verknüpfen"
```
The icon of the button can be changed. Both plain characters or SVG icons are supported:
```js
DoxygenAwesomeParagraphLink.icon = "¶"
```
All customizations must be applied before calling `DoxygenAwesomeParagraphLink.init()`!
## Interactive TOC {#extension-toc}
On large screens, the Table of Contents (TOC) is anchored on the top right of the page. This extension visualizes the reading progress by dynamically highlighting the currently active section.
On small screens, the extension hides the TOC by default. The user can open it manually when needed:
<div class="darkmode_inverted_image bordered_image">
{width=380}
</div>
### Installation
1. Add the required resources in your `Doxyfile`:
- **HTML_EXTRA_FILES:** `doxygen-awesome-interactive-toc.js`
2. In the `header.html` template, include `doxygen-awesome-interactive-toc.js` at the end of the `<head>` and then initialize it:
```html
<html>
<head>
<!-- ... other metadata & script includes ... -->
<script type="text/javascript" src="$relpath^doxygen-awesome-interactive-toc.js"></script>
<script type="text/javascript">
DoxygenAwesomeInteractiveToc.init()
</script>
</head>
<body>
```
### Customizing
The offset for when a headline is considered active can be changed. A smaller value means that the headline of the section must be closer to the top of the viewport before it is highlighted in the TOC:
```js
DoxygenAwesomeInteractiveToc.topOffset = 45
```
Hiding the TOC on small screens can be disabled. It is still interactive and can be hidden by the user but will now be open by default:
```js
DoxygenAwesomeInteractiveToc.hideMobileMenu = false
```
## Tabs {#extension-tabs}
@warning Experimental feature! Please report bugs [here](https://github.com/jothepro/doxygen-awesome-css/issues).
This extension allows to arrange list content in tabs:
<div class="tabbed">
- <b class="tab-title">Tab 1</b>
This is the content of tab 1
- <b class="tab-title">Tab 2</b>
This is the content of tab 2
1. it has a list
2. with multiple items
</div>
### Installation
1. Add the required resources in your `Doxyfile`:
- **HTML_EXTRA_FILES:** `doxygen-awesome-tabs.js`
2. In the `header.html` template, include `doxygen-awesome-tabs.js` at the end of the `<head>` and then initialize it:
```html
<html>
<head>
<!-- ... other metadata & script includes ... -->
<script type="text/javascript" src="$relpath^doxygen-awesome-tabs.js"></script>
<script type="text/javascript">
DoxygenAwesomeTabs.init()
</script>
</head>
<body>
```
### Usage
Each list that is supposed to be displayed as tabs has to be wrapped with the `tabbed` CSS class.
Each item in the list must start with an element that has the class `tab-title`. It will then be used as tab title.
```md
<div class="tabbed">
- <b class="tab-title">Tab 1</b> This is the content of tab 1
- <b class="tab-title">Tab 2</b> This is the content of tab 2
</div>
```
## Page Navigation {#extension-page-navigation}
@warning Experimental feature! Please report bugs [here](https://github.com/jothepro/doxygen-awesome-css/issues).
To allow the user to easily navigate from one document to another, "Next" and "Previous" buttons can be added at the end of a Markdown document.
### Installation
The feature is shipped inside the default `doxygen-awesome.css`. No additional stylesheets or scripts need to be added.
### Usage
The following conditions must be met for the feature to work properly:
- The navigation must be inside a Markdown table with 1-2 columns.
- The alignment of the column defines the alignment of the arrow on the navigation button.
- the table must be wrapped inside a `<div>` with the class `section_buttons`.
<div class="tabbed">
- <span class="tab-title">Code</span>
```md
<div class="section_buttons">
| Previous | Next |
|:------------------|----------------------------------:|
| [Home](README.md) | [Customization](customization.md) |
</div>
```
- <span class="tab-title">Result</span>
<div class="section_buttons">
| Previous | Next |
|:------------------|----------------------------------:|
| [Home](README.md) | [Customization](customization.md) |
</div>
</div>
<div class="section_buttons">
| Previous | Next |
|:------------------|----------------------------------:|
| [Home](README.md) | [Customization](customization.md) |
</div>
|
