1
2
3
4
5
6
7
8
9
10
11
12
13
14
15
16
17
18
19
20
21
22
23
24
25
26
27
28
29
30
31
32
33
34
35
36
37
38
39
40
41
42
43
44
45
46
47
48
49
50
51
52
53
54
55
56
57
58
59
60
61
62
63
64
65
66
67
68
69
70
71
72
73
74
75
76
77
78
79
80
81
82
83
84
85
86
87
88
89
90
91
92
93
94
95
96
97
98
99
100
101
102
103
104
105
106
107
108
109
110
111
112
113
114
115
116
117
118
119
120
121
122
123
124
125
126
127
128
129
130
131
132
133
134
135
136
137
138
139
140
141
142
143
144
145
146
147
148
149
150
151
152
153
154
155
156
157
158
159
160
161
162
163
164
165
166
167
168
169
170
171
172
173
174
175
176
177
178
179
180
181
182
183
184
185
186
187
188
189
190
191
192
193
194
195
196
197
198
199
200
201
202
203
204
205
206
207
208
209
210
211
212
213
214
215
216
217
218
219
220
221
|
# Java overview
<div class="banner">
<div class="java-text"></div>
<div class="vendor-logo java-logo"></div>
</div>
## About
In the [GhostPDL repository] sample `Java` projects can be found in `/demos/java`.
Within this location the following folders are of relevance:
- [jni] `jni`
- [gsjava] `gsjava`
- [gstest] `gstest`
- [gsviewer] `gsviewer`
## Platform & setup
### Building Ghostscript
Ghostscript should be built as a shared library for your platform.
See [Building Ghostscript].
### jni: Building the Java Native Interface
Before building the JNI ensure that Ghostscript has already been built for your platform and that you have JDK installed.
The JNI is for use in the Java interface,
this object must be placed somewhere on your Java PATH. On Windows, the DLL
can be placed in the working directory, next to `gsjava.jar`.
| Platform | JNI file |
|---|---|
|Windows|`gs_jni.dll`|
|MacOS|`gs_jni.dylib`|
|Linux / OpenBSD|`gs_jni.so`|
#### Preparing your include folder
The build scripts require the header `jni.h`, which defines
all JNI functions, and `jni_md.h`, which defines all system-specific
integer types. The build scripts expect an include folder relative to their location which contain these header files from your system.
These headers are typically found in the following directories:
| Platform | jni.h | jni_md.h |
|---|---|---|
|Windows|`C:\Program Files\Java\<JDK Install>\include\jni.h`|`C:\Program Files\Java\<JDK Install>\include\win32\jni_md.h`|
|MacOS|`/Library/Java/JavaVirtualMachines/<JDK Install>/Contents/Home/include/jni.h`|`/Library/Java/JavaVirtualMachines/<JDK Install>/Contents/Home/include/darwin/jni_md.h`|
|Linux|`/lib/jvm/<JDK Install>/include/jni.h`|`/lib/jvm/<JDK Install>/include/linux/jni_md.h`|
Once your `include` folder has been located folder you can copy it and place it in your `ghostpdl/demos/java/jni/gs_jni` folder.
Your build scripts should now be ready to run as they will be able to find the required JNI header files in their own relative include folder.
#### Building on Windows
The `jni` folder contains a Visual Studio Solution file `/jni/gs_jni/gs_jni.sln` which you should use to build the required JNI `gs_jni.dll` library file.
With the project open in Visual Studio, select the required architecture from the drop down - then right click on 'gs_jni' in the solution explorer and choose "Build".
#### Building on MacOS
On your command line, navigate to `ghostpdl/demos/java/jni/gs_jni` and ensure that the build script is executable and then run it, with:
```
chmod +x build_darwin.sh
./build_darwin.sh
```
#### Building on Linux
On your command line, navigate to `ghostpdl/demos/java/jni/gs_jni` and ensure that the build script is executable and then run it, with:
```
chmod +x build_linux.sh
./build_linux.sh
```
### gsjava: Building the JAR
#### Building with the command line
Navigate to `ghostpdl/demos/java/gsjava` and use the following:
| Platform | Run file|
|---|---|
|Windows| `build_win32.bat` |
|MacOS| `build_darwin.sh` |
|Linux| `build_linux.sh` |
> **NOTE**<br>
> `gsjava` has a dependency on [jni], please ensure that `gs_jni` is able to be built beforehand.
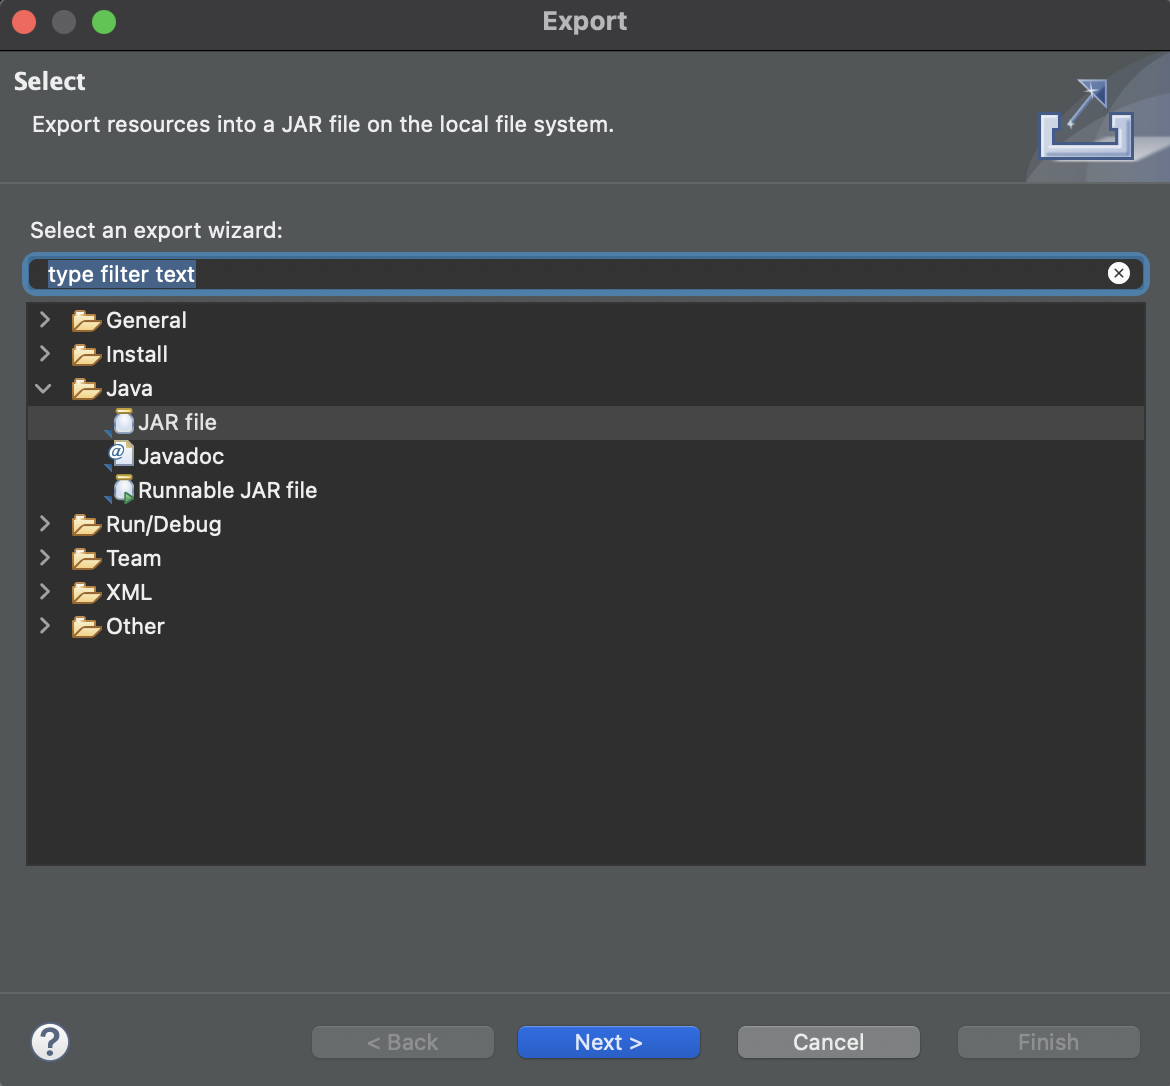
#### Building with Eclipse
Alternatively you can use [Eclipse] to build the JAR file.
Using [Eclipse] import the source folder `gsjava` as a project and select `Export > Java > JAR File` as shown in the screenshot example below:
#### Linking the JAR
The built JAR should be properly linked within your project Java Build Path as follows:

## Demo projects
### gstest
This project can be opened in [Eclipse] and used to test the Ghostscript API. The sample here simply sets up an instance of Ghostscript and then sets and gets some parameters accordingly.
### gsviewer
This project can be used to test the Ghostscript API alongside a UI which handles opening PostScript and PDF files. The sample application here allows for file browsing and Ghostscript file viewing.
Below is a screenshot of the sample application with a PDF open:

To run the project navigate to the `demos/java/gsviewer` location and ensure that the required libraries are in the directory:
| Platform | Ghostscript library file | JNI library file |
|---|---|---|
|Windows|`gpdldll64.dll`|`gs_jni.dll`|
|MacOS|`libgpdl.dylib`|`gs_jni.dylib`|
|Linux / OpenBSD|`libgpdl.so` (this may have been built as `libgs.so`, so it should be copied into this directory and renamed to `libgpdl.so`) |`gs_jni.so`|
#### Building on Windows
Run the `build_win32.bat` script.
#### Running on Windows
To run, open `gsviewer.jar` either through File Explorer or in the command line through the following command:
```
java -jar gsviewer.jar
```
#### Building on MacOS
On your command line, navigate to `ghostpdl/demos/java/gsviewer` and ensure that the build script is executable and then run it, with:
```
chmod +x build_darwin.sh
./build_darwin.sh
```
This will automatically build `gs_jni.dylib` (in the `ghostpdl/demos/java/jni/gs_jni/` location) and `gsjava.jar` `gsviewer.jar` in the `gsviewer` directory.
#### Running on MacOS
Ensure that the Ghostscript library exists in the `gsviewer` directory. (Copy and move the built library from `ghostpdl/sobin` as required).
Ensure that the run script is executable and then run it, with:
```
chmod +x start_darwin.sh
./start_darwin.sh
```
#### Building on Linux
On your command line, navigate to `ghostpdl/demos/java/gsviewer` and ensure that the build script is executable and then run it, with:
```
chmod +x build_linux.sh
./build_linux.sh
```
This will automatically build `gs_jni.so` (in the `ghostpdl/demos/java/jni/gs_jni/` location) and `gsjava.jar` `gsviewer.jar` in the `gsviewer` directory.
> **NOTE**<br>
> On Linux, when using OpenJDK, the property "assistive_technologies" may
need to be modified for the Java code to build. It can be modified by
editing the "accessibility.properties" file. This is located at:
>
> `/etc/java-8-openjdk/accessibility.properties`
>
#### Running on Linux
Ensure that the Ghostscript library exists in the `gsviewer` directory. (Copy and move the built library from `ghostpdl/sobin` as required).
Ensure that the run script is executable and then run it, with:
```
chmod +x start_linux.sh
./start_linux.sh
```
[jni]: #jni-building-the-java-native-interface
[gsjava]: #gsjava-building-the-jar
[gstest]: #gstest
[gsviewer]: #gsviewer
[Building Ghostscript]: index.html#building-ghostscript
[GhostPDL repository]: https://github.com/ArtifexSoftware/ghostpdl
[Eclipse]: https://www.eclipse.org/eclipseide/
|
