1
2
3
4
5
6
7
8
9
10
11
12
13
14
15
16
17
18
19
20
21
22
23
24
25
26
27
28
29
30
31
32
33
34
35
36
37
38
39
40
41
42
43
44
45
46
47
48
49
50
51
52
53
54
55
56
57
58
59
60
61
62
63
64
65
66
67
68
69
70
71
72
73
74
75
76
77
78
79
80
81
82
83
84
85
86
87
88
89
90
91
92
93
94
95
96
97
98
99
100
101
102
103
104
105
106
107
108
109
110
111
112
113
114
115
116
117
118
119
120
121
122
123
124
125
126
127
128
129
130
131
132
133
134
135
136
137
138
139
140
141
142
143
144
145
146
147
148
149
150
151
152
153
154
155
156
157
158
159
160
161
162
163
164
165
166
167
168
169
170
171
172
173
174
175
176
177
178
179
180
181
182
183
184
185
186
187
188
189
190
191
192
193
194
195
196
197
198
199
200
201
202
203
204
205
206
207
208
209
210
211
212
213
214
215
216
217
218
219
220
221
222
223
224
225
226
227
228
229
230
231
232
233
234
235
236
237
238
239
240
241
242
243
244
245
246
247
248
249
250
251
252
253
254
255
256
257
258
259
260
261
262
263
264
265
266
267
268
269
270
271
272
273
274
275
276
277
278
279
280
281
282
283
284
285
286
287
288
289
290
291
292
293
294
295
296
297
298
299
300
301
302
303
304
305
306
307
308
309
310
311
312
313
314
315
316
317
318
319
320
321
322
323
324
325
326
327
328
329
330
331
332
333
334
335
336
337
338
339
340
341
342
343
344
345
346
347
348
349
350
351
352
353
354
355
356
357
358
359
360
361
362
363
364
365
366
367
368
369
370
371
372
373
374
375
376
377
378
379
380
381
382
383
384
385
386
387
388
389
390
391
392
393
394
395
396
397
398
399
400
401
402
403
404
405
406
407
408
409
410
411
412
413
414
415
416
417
418
419
420
421
422
423
424
425
426
427
428
429
430
431
432
433
434
435
436
437
438
439
440
441
442
443
444
445
446
447
448
449
450
451
452
453
454
455
456
457
458
459
460
461
462
463
464
465
466
467
468
469
470
471
472
473
474
475
476
477
478
479
480
481
482
483
484
485
486
487
488
489
490
491
492
493
494
495
496
497
498
499
500
501
502
503
504
505
506
507
508
509
510
511
|
---
stage: none
group: unassigned
info: To determine the technical writer assigned to the Stage/Group associated with this page, see https://handbook.gitlab.com/handbook/product/ux/technical-writing/#assignments
---
# GitLab Admin area
DETAILS:
**Tier:** Free, Premium, Ultimate
**Offering:** Self-managed, GitLab Dedicated
The **Admin** area provides a web UI to manage and configure features of GitLab
self-managed instances. If you are an administrator, to access the **Admin** area:
- In GitLab 17.3 and later: on the left sidebar, at the bottom, select **Admin**.
- In GitLab 16.7 and later: on the left sidebar, at the bottom, select **Admin area**.
- In GitLab 16.1 and later: on the left sidebar, select **Search or go to**, then select **Admin**.
- In GitLab 16.0 and earlier: on the top bar, select **Main menu > Admin**.
If the GitLab instance uses Admin Mode, you must [enable Admin Mode for your session](settings/sign_in_restrictions.md#turn-on-admin-mode-for-your-session) before
the **Admin** button is visible.
NOTE:
Only administrators on GitLab self-managed or GitLab Dedicated can access the **Admin** area. On GitLab.com the **Admin** area feature is not available.
## Administering organizations
> - [Introduced](https://gitlab.com/gitlab-org/gitlab/-/issues/419540) in GitLab 16.10 [with a flag](feature_flags.md) named `ui_for_organizations`. Disabled by default.
FLAG:
On self-managed GitLab, by default this feature is not available. To make it available, an administrator can [enable the feature flag](feature_flags.md) named `ui_for_organizations`.
On GitLab.com and GitLab Dedicated, this feature is not available.
This feature is not ready for production use.
You can administer all organizations in the GitLab instance from the **Admin** area's Organizations page.
To access the Organizations page:
1. On the left sidebar, at the bottom, select **Admin**.
1. Select **Overview > Organizations**.
## Administering projects
You can administer all projects in the GitLab instance from the **Admin** area's Projects page.
To access the Projects page:
1. On the left sidebar, at the bottom, select **Admin**.
1. Select **Overview > Projects**.
1. Select the **All**, **Private**, **Internal**, or **Public** tab to list only
projects of that criteria.
By default, all projects are listed, in reverse order of when they were last updated. For each
project, the following information is listed:
- Name
- Namespace
- Description
- Size, updated every 15 minutes at most
Projects can be edited or deleted.
To edit a project's name or description:
1. In the Projects overview, next to the project you want to edit, select **Edit**.
1. Edit the **Project name** or **Project description**.
1. Select **Save Changes**.
To delete a project:
1. In the Projects overview, next to the project you want to delete, select **Delete**.
The list of projects can be sorted by:
- Updated date
- Last created
- Name
- Most stars
- Oldest created
- Oldest updated
- Largest repository
A user can choose to hide or show archived projects in the list.
In the **Filter by name** field, type the project name you want to find, and GitLab filters
them as you type.
To filter only projects in that namespace, select from the **Namespace** dropdown list.
You can combine the filter options. For example, to list only public projects with `score` in their name:
1. Select the **Public** tab.
1. Enter `score` in the **Filter by name** text box.
## Administering users
> - Filtering users [introduced](https://gitlab.com/gitlab-org/gitlab/-/issues/238183) in GitLab 17.0.
You can administer all users in the GitLab instance from the **Admin** area's Users page:
1. On the left sidebar, at the bottom, select **Admin**.
1. Select **Overview > Users**.
You can use the user search box to search and filter users by:
- User **access level**.
- Whether **two-factor authentication** is enabled or disabled.
- User **state**.
You can also type text into the search box. For example, the name of a specific user.
This text search is case insensitive, and applies partial matching to name, username and email for self-managed instances.
For each user, the following are listed:
- Username
- Email address
- Project membership count
- Group membership count
- Date of account creation
- Date of last activity
To edit a user, in the user's row, select **Edit**. To delete the user, or delete
the user and their contributions, select the cog dropdown list in that user's row,
and select the desired option.
To change the sort order:
1. Select the sort dropdown list.
1. Select the desired order.
By default the sort dropdown list shows **Name**.
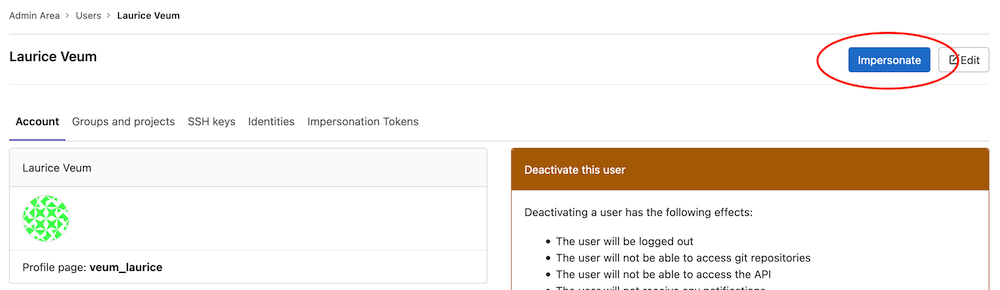
### User impersonation
An administrator can "impersonate" any other user, including other administrators.
This allows the administrator to "see what the user sees," and take actions on behalf of the user.
You can impersonate a user in the following ways:
- Through the UI:
1. On the left sidebar, at the bottom, select **Admin**.
1. On the left sidebar, select **Overview > Users**.
1. From the list of users, select a user.
1. Select **Impersonate**.
- With the API, using [impersonation tokens](../api/rest/authentication.md#impersonation-tokens).
All impersonation activities are [captured with audit events](audit_event_reports.md#user-impersonation).
By default, impersonation is enabled. GitLab can be configured to [disable impersonation](../api/rest/authentication.md#disable-impersonation).
### User identities
> - The ability to see a user's SCIM identity was [introduced](https://gitlab.com/gitlab-org/gitlab/-/issues/294608) in GitLab 15.3.
When using authentication providers, administrators can see the identities for a user:
1. On the left sidebar, at the bottom, select **Admin**.
1. Select **Overview > Users**.
1. From the list of users, select a user.
1. Select **Identities**.
This list shows the user's identities, including SCIM identities. Administrators can use this information to troubleshoot SCIM-related issues and confirm
the identities being used for an account.
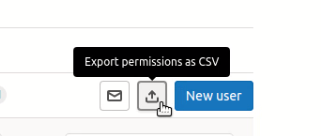
### User Permission Export
DETAILS:
**Tier:** Premium, Ultimate
**Offering:** Self-managed, GitLab Dedicated
An administrator can export user permissions for all users in the GitLab instance from the **Admin** area's Users page.
The export lists direct membership the users have in groups and projects.
The following data is included in the export:
- Username
- Email
- Type
- Path
- Access level ([Project](../user/permissions.md#project-members-permissions) and [Group](../user/permissions.md#group-members-permissions))
- Date of last activity. For a list of activities that populate this column, see the [Users API documentation](../api/users.md#list-a-users-activity).
Only the first 100,000 user accounts are exported.
### Users statistics
The **Users statistics** page provides an overview of user accounts by role. These statistics are
calculated daily, so user changes made since the last update are not reflected.
The following totals are also included:
- Billable users
- Blocked users
- Total users
GitLab billing is based on the number of [**Billable users**](../subscriptions/self_managed/index.md#billable-users).
### Add email to user
You must be an administrator to manually add emails to users:
1. On the left sidebar, at the bottom, select **Admin**.
1. Select **Overview > Users**.
1. Locate the user and select them.
1. Select **Edit**.
1. In **Email**, enter the new email address. This adds the new email address to the
user and sets the previous email address to be a secondary.
1. Select **Save changes**.
## User cohorts
The [Cohorts](user_cohorts.md) tab displays the monthly cohorts of new users and their activities over time.
## Prevent a user from creating top-level groups
By default, users can create top-level groups. To prevent a user from creating a top-level group:
1. On the left sidebar, at the bottom, select **Admin**.
1. Select **Overview > Users**.
1. Locate the user and select them.
1. Select **Edit**.
1. Clear the **Can create top level group** checkbox.
1. Select **Save changes**.
It is also possible to [limit which roles can create a subgroup within a group](../user/group/subgroups/index.md#change-who-can-create-subgroups).
## Administering groups
You can administer all groups in the GitLab instance from the **Admin** area's Groups page.
To access the Groups page:
1. On the left sidebar, at the bottom, select **Admin**.
1. Select **Overview > Groups**.
For each group, the page displays their name, description, size, number of projects in the group,
number of members, and whether the group is private, internal, or public. To edit a group, in the group's row, select **Edit**. To delete the group, in the group's row, select **Delete**.
To change the sort order, select the sort dropdown list and choose the desired order.
You can sort groups by:
- Created date (default)
- Updated date
- Storage size
The storage size option sorts groups by the total storage used, including Git repositories
and Large File Storage (LFS) for all projects in the group. For more information, see [usage quotas](../user/storage_usage_quotas.md).
To search for groups by name, enter your criteria in the search field. The group search is case
insensitive, and applies partial matching.
To [Create a new group](../user/group/index.md#create-a-group) select **New group**.
## Administering topics
> - Merging topics [introduced](https://gitlab.com/gitlab-org/gitlab/-/issues/366884) in GitLab 15.5.
You can categorize and find similar projects with [topics](../user/project/project_topics.md).
### View all topics
To view all topics in the GitLab instance:
1. On the left sidebar, at the bottom, select **Admin**.
1. Select **Overview > Topics**.
For each topic, the page displays its name and the number of projects labeled with the topic.
### Search for topics
1. On the left sidebar, at the bottom, select **Admin**.
1. Select **Overview > Topics**.
1. In the search box, enter your search criteria.
The topic search is case-insensitive and applies partial matching.
### Create a topic
To create a topic:
1. On the left sidebar, at the bottom, select **Admin**.
1. Select **Overview > Topics**.
1. Select **New topic**.
1. Enter the **Topic slug (name)** and **Topic title**.
1. Optional. Enter a **Description** and add a **Topic avatar**.
1. Select **Save changes**.
The created topics are displayed on the **Explore topics** page.
NOTE:
The assigned topics are visible only to everyone with access to the project,
but everyone can see which topics exist on the GitLab instance.
Do not include sensitive information in the name of a topic.
### Edit a topic
You can edit a topic's name, title, description, and avatar at any time.
To edit a topic:
1. On the left sidebar, at the bottom, select **Admin**.
1. Select **Overview > Topics**.
1. Select **Edit** in that topic's row.
1. Edit the topic slug (name), title, description, or avatar.
1. Select **Save changes**.
### Remove a topic
If you no longer need a topic, you can permanently remove it.
To remove a topic:
1. On the left sidebar, at the bottom, select **Admin**.
1. Select **Overview > Topics**.
1. To remove a topic, select **Remove** in that topic's row.
### Merge topics
You can move all projects assigned to a topic to another topic.
The source topic is then permanently deleted.
After a merged topic is deleted, you cannot restore it.
To merge topics:
1. On the left sidebar, at the bottom, select **Admin**.
1. Select **Overview > Topics**.
1. Select **Merge topics**.
1. From the **Source topic** dropdown list, select the topic you want to merge and remove.
1. From the **Target topic** dropdown list, select the topic you want to merge the source topic into.
1. Select **Merge**.
## Administering Gitaly servers
You can list all Gitaly servers in the GitLab instance from the **Admin** area's **Gitaly servers**
page. For more details, see [Gitaly](gitaly/index.md).
To access the **Gitaly servers** page:
1. On the left sidebar, at the bottom, select **Admin**.
1. Select **Overview > Gitaly servers**.
For each Gitaly server, the following details are listed:
| Field | Description |
|----------------|-------------|
| Storage | Repository storage |
| Address | Network address on which the Gitaly server is listening |
| Server version | Gitaly version |
| Git version | Version of Git installed on the Gitaly server |
| Up to date | Indicates if the Gitaly server version is the latest version available. A green dot indicates the server is up to date. |
## CI/CD section
### Administering runners
> - [Moved](https://gitlab.com/gitlab-org/gitlab/-/issues/340859) from **Overview > Runners** to **CI/CD > Runners** in GitLab 15.8.
You can administer all runners in the GitLab instance from the **Admin** area's **Runners** page. See
[GitLab Runner](https://docs.gitlab.com/runner/) for more information.
To access the **Runners** page:
1. On the left sidebar, at the bottom, select **Admin**.
1. Select **CI/CD > Runners**.
#### Search and filter runners
To search runners' descriptions:
1. In the **Search or filter results** text box, type the description of the runner you want to
find.
1. Press <kbd>Enter</kbd>.
You can also filter runners by status, type, and tag. To filter:
1. Select a tab or the **Search or filter results** text box.
1. Select any **Type**, or filter by **Status** or **Tags**.
1. Select or enter your search criteria.

#### Bulk delete runners
> - [Introduced](https://gitlab.com/gitlab-org/gitlab/-/issues/370241) in GitLab 15.4.
> - [Feature flag removed](https://gitlab.com/gitlab-org/gitlab/-/issues/353981) in GitLab 15.5.
You can delete multiple runners at the same time.
1. On the left sidebar, at the bottom, select **Admin**.
1. Select **Overview > Runners**.
1. To the left of the runners you want to delete, select the checkbox.
To select all of the runners on the page, select the checkbox above
the list.
1. Select **Delete selected**.
#### Runner attributes
For each runner, the following attributes are listed:
| Attribute | Description |
|--------------|-------------|
| Status | The status of the runner. In [GitLab 15.1 and later](https://gitlab.com/gitlab-org/gitlab/-/issues/22224), for the **Ultimate** tier, the upgrade status is available. |
| Runner details | Information about the runner, including partial token and details about the computer the runner was registered from. |
| Version | GitLab Runner version. |
| Jobs | Total number of jobs run by the runner. |
| Tags | Tags associated with the runner. |
| Last contact | Timestamp indicating when the runner last contacted the GitLab instance. |
You can also edit, pause, or remove each runner.
### Administering Jobs
> - [Moved](https://gitlab.com/gitlab-org/gitlab/-/issues/386311) from **Overview > Jobs** to **CI/CD > Jobs** in GitLab 15.8.
You can administer all jobs in the GitLab instance from the **Admin** area's Jobs page.
To access the Jobs page:
1. On the left sidebar, at the bottom, select **Admin**.
1. Select **CI/CD > Jobs**. All jobs are listed, in descending order of job ID.
1. Select the **All** tab to list all jobs. Select the **Pending**, **Running**, or **Finished**
tab to list only jobs of that status.
For each job, the following details are listed:
| Field | Description |
|----------|-------------|
| Status | Job status, either **passed**, **skipped**, or **failed**. |
| Job | Includes links to the job, branch, and the commit that started the job. |
| Pipeline | Includes a link to the specific pipeline. |
| Project | Name of the project, and organization, to which the job belongs. |
| Runner | Name of the CI runner assigned to execute the job. |
| Stage | Stage that the job is declared in a `.gitlab-ci.yml` file. |
| Name | Name of the job specified in a `.gitlab-ci.yml` file. |
| Timing | Duration of the job, and how long ago the job completed. |
| Coverage | Percentage of tests coverage. |
## Monitoring section
The following topics document the **Monitoring** section of the **Admin** area.
### System information
> - Support for relative time [introduced](https://gitlab.com/gitlab-org/gitlab/-/issues/341248) in GitLab 15.2. "Uptime" statistic was renamed to "System started".
The **System information** page provides the following statistics:
| Field | Description |
|:---------------|:--------------------------------------------------|
| CPU | Number of CPU cores available |
| Memory Usage | Memory in use, and total memory available |
| Disk Usage | Disk space in use, and total disk space available |
| System started | When the system hosting GitLab was started. In GitLab 15.1 and earlier, this was an uptime statistic. |
These statistics are updated only when you go to the **System information** page, or you refresh the page in your browser.
### Background jobs
The **Background jobs** page displays the Sidekiq dashboard. Sidekiq is used by GitLab to
perform processing in the background.
The Sidekiq dashboard consists of the following elements:
- A tab per jobs' status.
- A breakdown of background job statistics.
- A live graph of **Processed** and **Failed** jobs, with a selectable polling interval.
- An historical graph of **Processed** and **Failed** jobs, with a selectable time span.
- Redis statistics, including:
- Version number
- Uptime, measured in days
- Number of connections
- Current memory usage, measured in MB
- Peak memory usage, measured in MB
### Logs
**Log** view has been removed from the **Admin** area dashboard since the logging does not work in multi-node setups and could cause confusion for administrators by displaying partial information.
For multi-node systems we recommend ingesting the logs into services like Elasticsearch and Splunk.
| Log file | Contents |
|:------------------------|:---------|
| `application_json.log` | GitLab user activity |
| `git_json.log` | Failed GitLab interaction with Git repositories |
| `production.log` | Requests received from Puma, and the actions taken to serve those requests |
| `sidekiq.log` | Background jobs |
| `repocheck.log` | Repository activity |
| `integrations_json.log` | Activity between GitLab and integrated systems |
| `kubernetes.log` | Kubernetes activity |
The contents of these log files can be useful when troubleshooting a problem.
For details of these log files and their contents, see [Log system](logs/index.md).
The content of each log file is listed in chronological order. To minimize performance issues, a maximum 2000 lines of each log file are shown.
### Audit events
DETAILS:
**Tier:** Premium, Ultimate
**Offering:** Self-managed, GitLab Dedicated
The **Audit events** page lists changes made within the GitLab server. With this information you can control, analyze, and track every change.
### Statistics
The **Instance overview** section of the Dashboard lists the current statistics of the GitLab instance. This information is retrieved using the [Application statistics API](../api/statistics.md#get-current-application-statistics).
NOTE:
These statistics show exact counts for values less than 10,000. For values of 10,000 and higher, these statistics show approximate data
when [TablesampleCountStrategy](https://gitlab.com/gitlab-org/gitlab/-/blob/master/lib/gitlab/database/count/tablesample_count_strategy.rb?ref_type=heads#L16) and [ReltuplesCountStrategy](https://gitlab.com/gitlab-org/gitlab/-/blob/master/lib/gitlab/database/count/reltuples_count_strategy.rb?ref_type=heads) strategies are used for calculations.
|
