1
2
3
4
5
6
7
8
9
10
11
12
13
14
15
16
17
18
19
20
21
22
23
24
25
26
27
28
29
30
31
32
33
34
35
36
37
38
39
40
41
42
43
44
45
46
47
48
49
50
51
52
53
54
55
56
57
58
59
60
61
62
63
64
65
66
67
68
69
70
71
72
73
74
75
76
77
78
79
80
81
82
83
84
85
86
87
88
89
90
91
92
93
94
95
96
97
98
99
100
101
102
103
104
105
106
107
108
109
110
111
112
113
114
115
116
117
118
119
120
121
122
123
124
125
126
127
128
129
130
131
132
133
134
135
136
137
138
139
140
141
142
143
144
145
146
147
148
149
150
151
152
153
154
155
156
157
158
159
160
161
162
163
164
165
166
167
168
169
170
171
172
173
174
175
176
177
178
179
180
181
182
183
184
|
---
stage: Plan
group: Project Management
info: To determine the technical writer assigned to the Stage/Group associated with this page, see https://handbook.gitlab.com/handbook/product/ux/technical-writing/#assignments
---
# Tutorial: Set up a project for idea management
DETAILS:
**Tier:** Free, Premium, Ultimate
**Offering:** GitLab.com, Self-managed, GitLab Dedicated
<!-- vale gitlab_base.FutureTense = NO -->
Idea management refers to the collection, organization, evaluation, and implementation of ideas
within an organization or community.
Ideas can originate from various stakeholders, such as employees, customers, or partners.
A separate idea backlog allows the team to capture and prioritize potential concepts and suggestions
before they're fully fleshed out.
Having this separate backlog enables efficient management of raw ideas.
It does so without cluttering the main backlog with unrefined or not validated concepts.
In this tutorial, you'll learn how to set up a GitLab project for idea management.
To set up GitLab for idea management in a project:
1. [Create a project](#create-a-project)
1. [Define the idea workflow](#define-the-idea-workflow)
1. [Document your criteria](#document-your-criteria)
1. [Create scoped labels](#create-scoped-labels)
1. [Create an idea status board](#create-an-idea-status-board)
1. [Stakeholders submit and vote on ideas](#stakeholders-submit-and-vote-on-ideas)
1. [Triage new ideas](#triage-new-ideas)
## Before you begin
- If you're using an existing project for this tutorial, make sure you have at least the Reporter role
for the project.
- If you follow the steps below and later decide to create a
parent group for your project, to make
best use of labels, you'll have to promote the project labels to group labels.
## Create a project
A project contains the issues that will be used to track ideas.
To create a blank project:
1. On the left sidebar, at the top, select **Create new** (**{plus}**) and **New project/repository**.
1. Select **Create blank project**.
1. Enter the project details.
- For **Project name**, enter `Idea management tutorial`.
1. Select **Create project**.
## Define the idea workflow
Next, you'll need to determine the **status workflow** that ideas will follow.
Communicating the status of an idea helps set the correct expectations with stakeholders.
For this tutorial, suppose you've decided on the following status workflow:
- `In Review`
- `Backlog`
- `In Progress`
- `Complete`
- `Rejected`
## Document your criteria
After you agree on the status workflow, write it all down somewhere your team mates can always access.
For example, add it to a [wiki](../../user/project/wiki/index.md) in your project, or your company
handbook published with [GitLab Pages](../../user/project/pages/index.md).
<!-- Idea for expanding this tutorial:
Add steps for [creating a wiki page](../../user/project/wiki/index.md#create-a-new-wiki-page). -->
## Create scoped labels
DETAILS:
**Tier:** Premium, Ultimate
**Offering:** GitLab.com, Self-managed, GitLab Dedicated
Next, you'll create labels to add to ideas to represent the status workflow.
The best tool for this is [scoped labels](../../user/project/labels.md#scoped-labels), which you
can use to set mutually exclusive attributes.
Checking with the list of statuses you've assembled
[previously](#define-the-idea-workflow), you'll want to create matching
scoped labels.
The double colon (`::`) in the name of a scoped label prevents two labels of the same scope being
used together.
For example, if you add the `status::backlog` label to an issue that already has `status::in review`, the
previous one is removed.
NOTE:
Scoped labels are available in the Premium and Ultimate tier.
If you're on the Free tier, you can use regular labels instead.
However, they aren't mutually exclusive.
To create each label:
1. On the left sidebar, select **Search or go to** and find your project.
1. Select **Manage > Labels**.
1. Select **New label**.
1. In the **Title** field, enter the name of the label. Start with `status::in review`.
1. Optional. Select a color by selecting from the available colors, or enter a hex color value for
a specific color in the **Background color** field.
1. Select **Create label**.
Repeat these steps to create all the labels you'll need:
- `status::backlog`
- `status::in progress`
- `status::complete`
- `status::rejected`
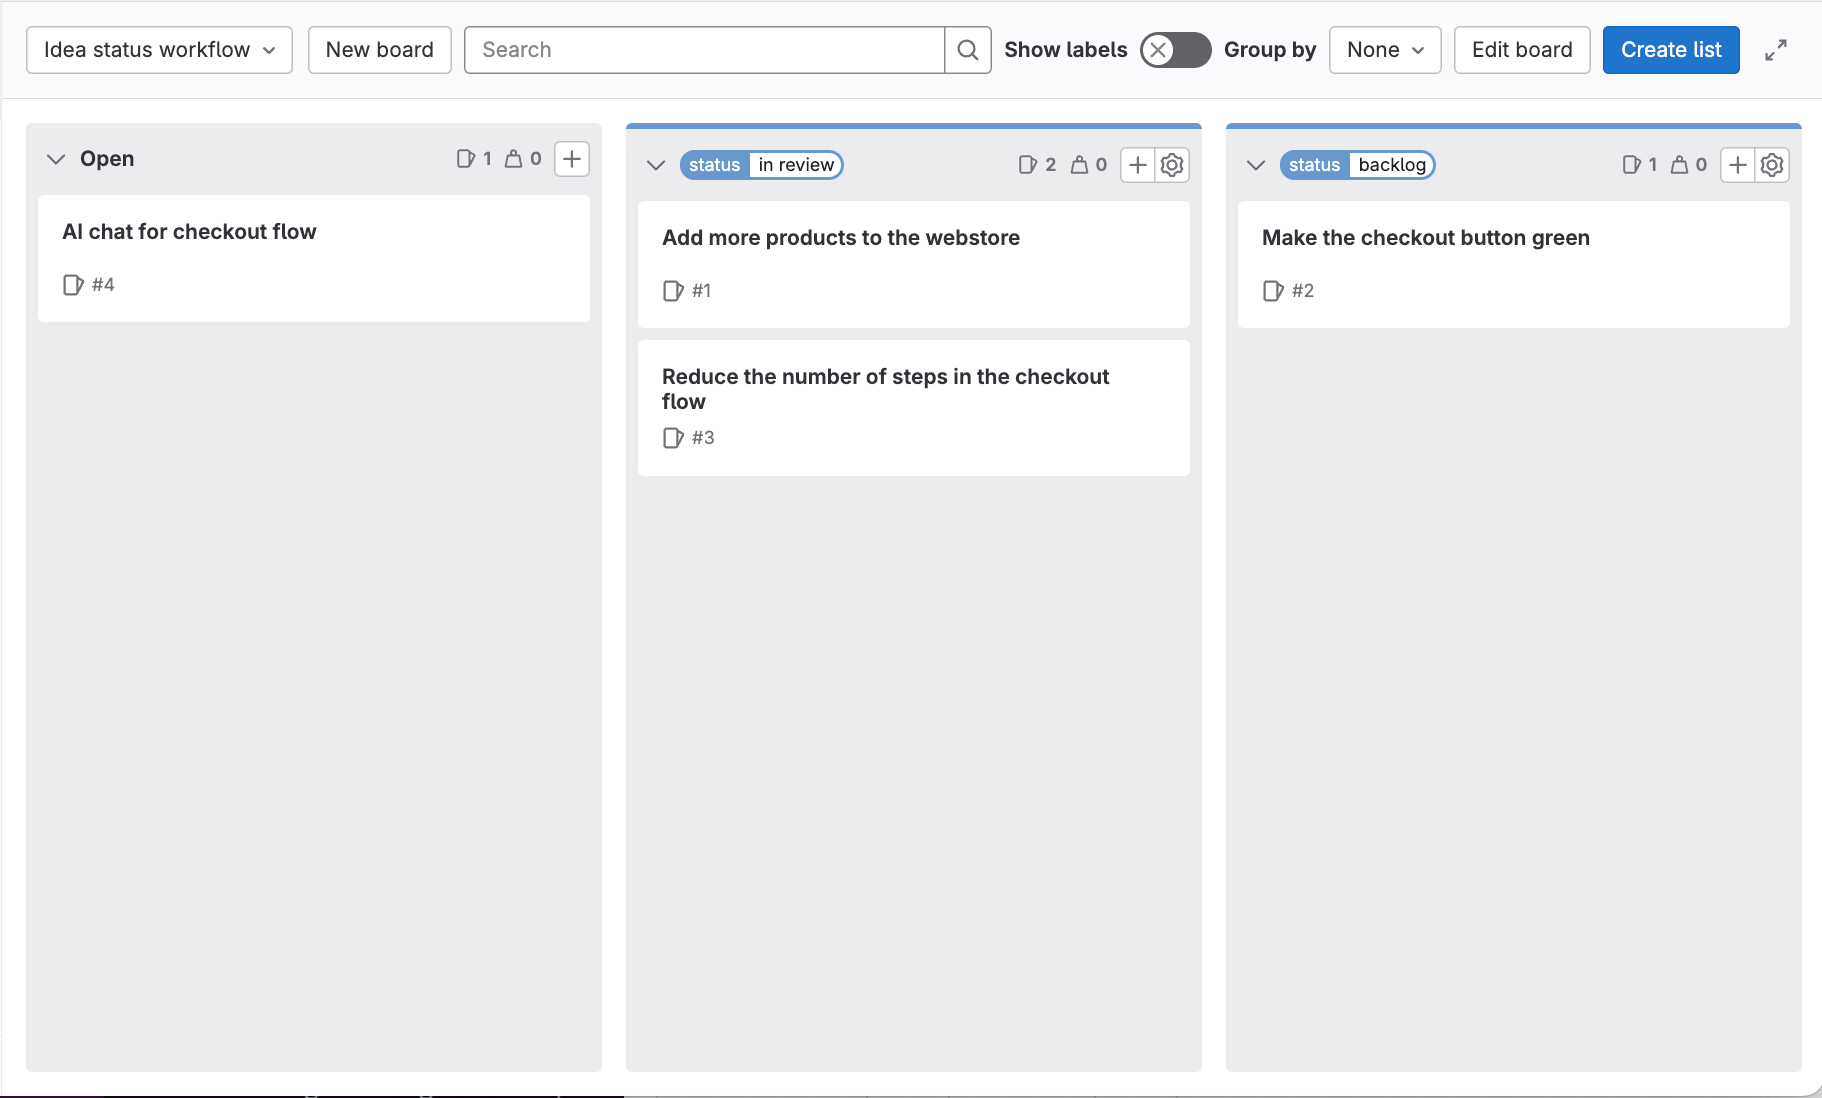
## Create an idea status board
To prepare for the incoming ideas, create an [issue board](../../user/project/issue_board.md) that organizes ideas by label.
You'll use it to quickly create issues and add labels to them by dragging cards to various lists.
To set up your issue board:
1. On the left sidebar, select **Search or go to** and find your
**Idea management tutorial** project.
1. Select **Plan > Issue boards**.
1. In the upper-left corner of the issue board page, select the dropdown list with the current board name.
1. Select **Create new board**.
1. In the **Title field**, enter `Idea status workflow`.
1. Keep the **Show the Open list** checkbox selected and clear the **Show the Closed list** one.
1. Select **Create board**. You should see an empty board.
1. Create a list for the `status::in review` label:
1. In the upper-left corner of the issue board page, select **Create list**.
1. In the column that appears, from the **Value** dropdown list, select the `status::in review` label.
1. Select **Add to board**.
1. Repeat the previous step for labels `status::backlog`, `status::in progress`, `status::complete`, and `status::rejected`.
For now, the lists in your board should be empty. Next, you'll populate them with some issues.

## Stakeholders submit and vote on ideas
Share your idea management project with stakeholders and invite them to document their ideas!
To invite your stakeholders:
1. On the left sidebar, select **Manage > Members**
1. Select **Invite members**
1. Type your stakeholders email address.
1. Select **Reporter** role.
Your stakeholders can now access your project to create new ideas:
1. On the left sidebar, select **Plan > Issues**
1. On the top right, select **New issue**
1. Enter a title and description.
1. Select **Create issue**
Stakeholders can also upvote an existing idea to signal that they are interested in an idea:
1. On the left sidebar, select **Plan > Issues**.
1. Select an issue.
1. Select the **Thumbs up** [emoji reaction](../../user/emoji_reactions.md) under the issue description.
## Triage new ideas
Try it out by dragging some issues from the **Open** list to one of the label lists to set the workflow status.
## Next steps
Next, you can:
- Create an [issue template](../../user/project/description_templates.md) to gather all the important
details from your stakeholders.
- Use [comments and threads](../../user/discussions/index.md) to gather more information about an idea.
- [Relate](../../user/project/issues/related_issues.md) issues in your team backlog to issues in your
idea project.
|
