1
2
3
4
5
6
7
8
9
10
11
12
13
14
15
16
17
18
19
20
21
22
23
24
25
26
27
28
29
30
31
32
33
34
35
36
37
38
39
40
41
42
43
44
45
46
47
48
49
50
51
52
53
54
55
56
57
58
59
60
61
62
63
64
65
66
67
68
69
70
71
72
73
74
75
76
77
78
79
80
81
82
83
84
85
86
87
88
89
90
91
92
93
94
95
96
97
98
99
100
101
102
103
104
105
106
107
|
# How to run deep networks on Android device {#tutorial_dnn_android}
@tableofcontents
@prev_tutorial{tutorial_dnn_halide_scheduling}
@next_tutorial{tutorial_dnn_yolo}
| | |
| -: | :- |
| Original author | Dmitry Kurtaev |
| Compatibility | OpenCV >= 3.3 |
## Introduction
In this tutorial you'll know how to run deep learning networks on Android device
using OpenCV deep learning module.
Tutorial was written for the following versions of corresponding software:
- Android Studio 2.3.3
- OpenCV 3.3.0+
## Requirements
- Download and install Android Studio from https://developer.android.com/studio.
- Get the latest pre-built OpenCV for Android release from https://github.com/opencv/opencv/releases and unpack it (for example, `opencv-4.X.Y-android-sdk.zip`).
- Download MobileNet object detection model from https://github.com/chuanqi305/MobileNet-SSD. We need a configuration file `MobileNetSSD_deploy.prototxt` and weights `MobileNetSSD_deploy.caffemodel`.
## Create an empty Android Studio project
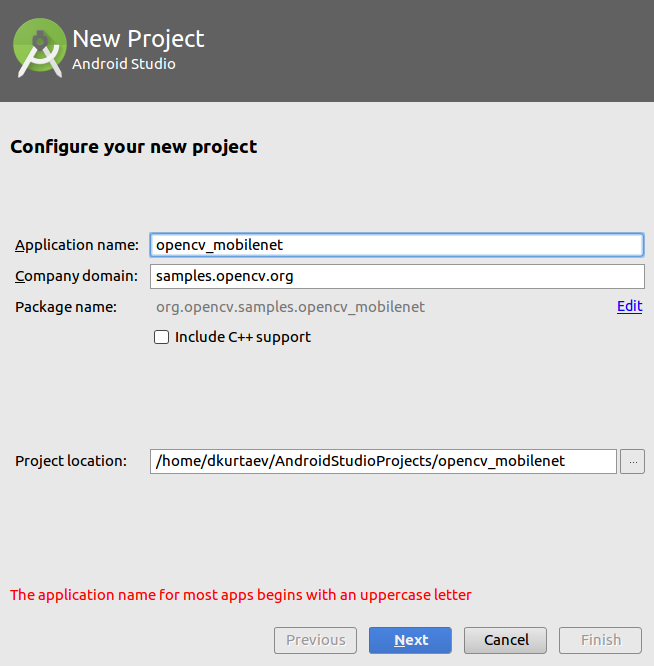
- Open Android Studio. Start a new project. Let's call it `opencv_mobilenet`.
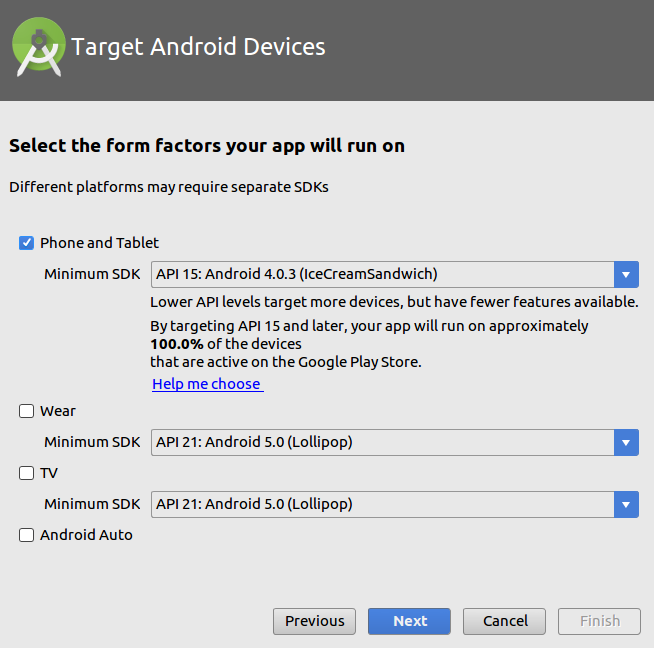
- Keep default target settings.
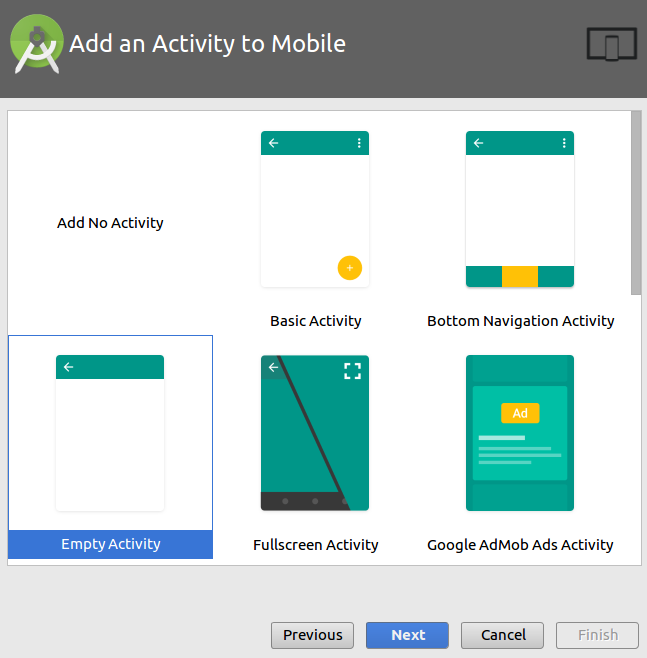
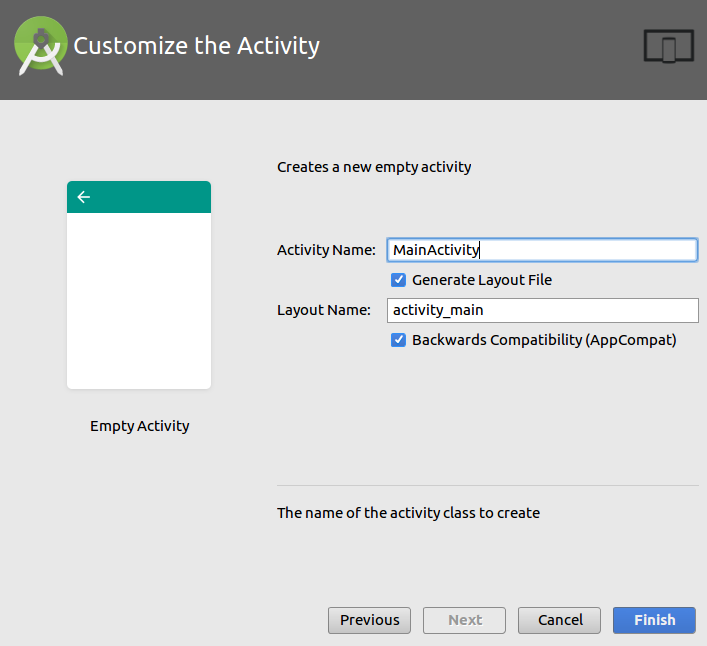
- Use "Empty Activity" template. Name activity as `MainActivity` with a
corresponding layout `activity_main`.
- Wait until a project was created. Go to `Run->Edit Configurations`.
Choose `USB Device` as target device for runs.

Plug in your device and run the project. It should be installed and launched
successfully before we'll go next.
@note Read @ref tutorial_android_dev_intro in case of problems.

## Add OpenCV dependency
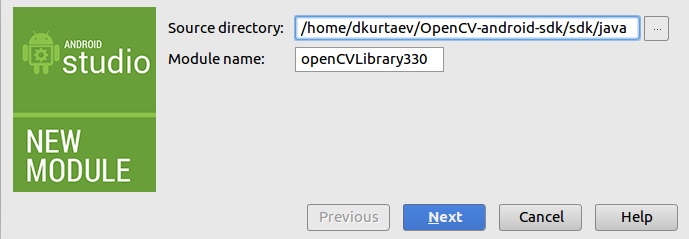
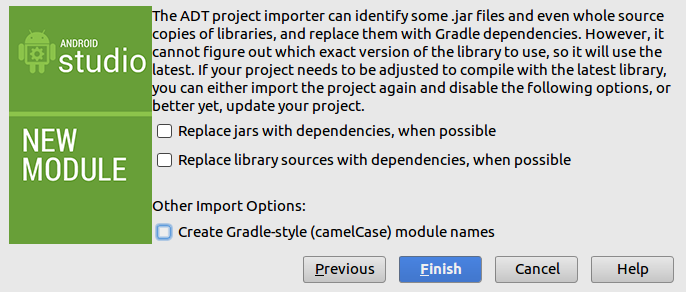
- Go to `File->New->Import module` and provide a path to `unpacked_OpenCV_package/sdk/java`. The name of module detects automatically.
Disable all features that Android Studio will suggest you on the next window.
- Open two files:
1. `AndroidStudioProjects/opencv_mobilenet/app/build.gradle`
2. `AndroidStudioProjects/opencv_mobilenet/openCVLibrary330/build.gradle`
Copy both `compileSdkVersion` and `buildToolsVersion` from the first file to
the second one.
`compileSdkVersion 14` -> `compileSdkVersion 26`
`buildToolsVersion "25.0.0"` -> `buildToolsVersion "26.0.1"`
- Make the project. There is no errors should be at this point.
- Go to `File->Project Structure`. Add OpenCV module dependency.


- Install once an appropriate OpenCV manager from `unpacked_OpenCV_package/apk`
to target device.
@code
adb install OpenCV_3.3.0_Manager_3.30_armeabi-v7a.apk
@endcode
- Congratulations! We're ready now to make a sample using OpenCV.
## Make a sample
Our sample will takes pictures from a camera, forwards it into a deep network and
receives a set of rectangles, class identifiers and confidence values in `[0, 1]`
range.
- First of all, we need to add a necessary widget which displays processed
frames. Modify `app/src/main/res/layout/activity_main.xml`:
@include android/mobilenet-objdetect/res/layout/activity_main.xml
- Put downloaded `MobileNetSSD_deploy.prototxt` and `MobileNetSSD_deploy.caffemodel`
into `app/build/intermediates/assets/debug` folder.
- Modify `/app/src/main/AndroidManifest.xml` to enable full-screen mode, set up
a correct screen orientation and allow to use a camera.
@include android/mobilenet-objdetect/gradle/AndroidManifest.xml
- Replace content of `app/src/main/java/org/opencv/samples/opencv_mobilenet/MainActivity.java`:
@include android/mobilenet-objdetect/src/org/opencv/samples/opencv_mobilenet/MainActivity.java
- Launch an application and make a fun!

|
