1
2
3
4
5
6
7
8
9
10
11
12
13
14
15
16
17
18
19
20
21
22
23
24
25
26
27
28
29
30
31
32
33
34
35
36
37
38
39
40
41
42
43
44
45
46
47
48
49
50
51
52
53
54
55
56
57
58
59
60
61
62
63
64
65
66
67
68
69
70
71
72
73
74
75
76
77
78
79
80
81
82
83
84
85
86
87
88
89
90
91
92
93
94
95
96
97
98
99
100
101
102
103
104
105
106
107
108
109
110
111
112
113
114
115
116
117
118
119
120
121
122
123
124
125
126
127
128
129
130
131
132
133
134
135
136
137
138
139
140
141
142
143
144
145
146
147
148
149
150
151
152
153
154
155
156
157
158
159
160
161
162
163
164
165
166
167
168
169
170
171
172
173
174
175
176
177
178
179
180
181
182
183
184
185
186
187
188
189
190
191
192
193
194
195
196
197
198
199
200
201
202
203
204
205
206
207
208
209
210
211
212
213
214
215
216
217
218
219
220
221
222
223
224
225
226
227
228
229
230
231
232
233
234
235
236
237
238
239
240
241
242
243
244
245
246
247
248
249
250
251
252
253
254
255
256
257
258
259
260
261
262
263
264
265
266
267
268
269
270
271
272
273
274
275
276
277
278
279
280
281
282
283
284
285
286
287
288
289
290
291
292
293
294
295
296
297
298
299
300
301
302
303
304
305
306
307
308
309
310
311
312
313
314
315
316
317
318
319
320
321
322
323
324
325
326
327
328
329
330
331
332
333
334
335
336
337
338
339
340
341
342
343
344
345
346
347
348
349
350
351
352
353
354
355
356
357
358
359
360
361
362
363
364
365
366
367
368
369
370
371
372
373
374
375
376
377
378
379
380
381
382
383
384
385
386
387
388
389
390
391
392
393
394
395
396
397
398
399
400
401
402
403
404
405
406
407
408
409
410
411
412
413
414
415
416
417
418
419
420
421
422
423
424
425
426
427
428
429
430
431
432
433
434
435
436
437
438
439
440
441
442
443
444
445
446
447
448
449
450
451
452
453
454
455
456
457
458
459
460
461
462
463
464
465
466
467
468
469
470
471
472
473
474
475
476
477
478
479
480
481
482
483
484
485
486
487
488
489
490
491
492
493
494
495
496
497
498
499
500
501
502
503
504
505
506
507
508
509
510
511
512
513
514
515
516
517
518
519
520
521
522
523
524
525
526
527
528
529
530
531
532
533
534
535
536
537
538
539
540
541
542
543
544
545
546
547
548
549
550
551
552
553
554
555
556
557
558
559
560
561
562
563
564
565
566
567
568
569
570
571
572
573
574
575
576
577
578
579
580
581
582
583
584
585
586
587
588
589
590
591
592
593
594
595
596
597
|
Introduction to OpenCV Development with Clojure {#tutorial_clojure_dev_intro}
===============================================
@prev_tutorial{tutorial_java_eclipse}
@next_tutorial{tutorial_android_dev_intro}
| | |
| -: | :- |
| Original author | Mimmo Cosenza |
| Compatibility | OpenCV >= 3.0 |
@warning
This tutorial can contain obsolete information.
As of OpenCV 2.4.4, OpenCV supports desktop Java development using nearly the same interface as for
Android development.
[Clojure](http://clojure.org/) is a contemporary LISP dialect hosted by the Java Virtual Machine and
it offers a complete interoperability with the underlying JVM. This means that we should even be
able to use the Clojure REPL (Read Eval Print Loop) as and interactive programmable interface to the
underlying OpenCV engine.
What we'll do in this tutorial
------------------------------
This tutorial will help you in setting up a basic Clojure environment for interactively learning
OpenCV within the fully programmable CLojure REPL.
### Tutorial source code
You can find a runnable source code of the sample in the `samples/java/clojure/simple-sample` folder
of the OpenCV repository. After having installed OpenCV and Clojure as explained in the tutorial,
issue the following command to run the sample from the command line.
@code{.bash}
cd path/to/samples/java/clojure/simple-sample
lein run
@endcode
Preamble
--------
For detailed instruction on installing OpenCV with desktop Java support refer to the @ref tutorial_java_dev_intro "corresponding
tutorial".
If you are in hurry, here is a minimum quick start guide to install OpenCV on Mac OS X:
@note
I'm assuming you already installed [xcode](https://developer.apple.com/xcode/),
[jdk](http://www.oracle.com/technetwork/java/javase/downloads/index.html) and
[Cmake](http://www.cmake.org/cmake/resources/software.html).
@code{.bash}
cd ~/
mkdir opt
git clone https://github.com/opencv/opencv.git
cd opencv
git checkout 2.4
mkdir build
cd build
cmake -DBUILD_SHARED_LIBS=OFF ..
...
...
make -j8
# optional
# make install
@endcode
Install Leiningen
-----------------
Once you installed OpenCV with desktop java support the only other requirement is to install
[Leiningeng](https://github.com/technomancy/leiningen) which allows you to manage the entire life
cycle of your CLJ projects.
The available [installation guide](https://github.com/technomancy/leiningen#installation) is very
easy to be followed:
-# [Download the script](https://raw.github.com/technomancy/leiningen/stable/bin/lein)
-# Place it on your $PATH (cf. \~/bin is a good choice if it is on your path.)
-# Set the script to be executable. (i.e. chmod 755 \~/bin/lein).
If you work on Windows, follow [this instruction](https://github.com/technomancy/leiningen#windows)
You now have both the OpenCV library and a fully installed basic Clojure environment. What is now
needed is to configure the Clojure environment to interact with the OpenCV library.
Install the localrepo Leiningen plugin
--------------------------------------
The set of commands (tasks in Leiningen parlance) natively supported by Leiningen can be very easily
extended by various plugins. One of them is the
[lein-localrepo](https://github.com/kumarshantanu/lein-localrepo) plugin which allows to install any
jar lib as an artifact in the local maven repository of your machine (typically in the
\~/.m2/repository directory of your username).
We're going to use this lein plugin to add to the local maven repository the opencv components
needed by Java and Clojure to use the opencv lib.
Generally speaking, if you want to use a plugin on project base only, it can be added directly to a
CLJ project created by lein.
Instead, when you want a plugin to be available to any CLJ project in your username space, you can
add it to the profiles.clj in the \~/.lein/ directory.
The lein-localrepo plugin will be useful to me in other CLJ projects where I need to call native
libs wrapped by a Java interface. So I decide to make it available to any CLJ project:
@code{.bash}
mkdir ~/.lein
@endcode
Create a file named profiles.clj in the \~/.lein directory and copy into it the following content:
@code{.clojure}
{:user {:plugins [[lein-localrepo "0.5.2"]]}}
@endcode
Here we're saying that the version release "0.5.2" of the lein-localrepo plugin will be available to
the :user profile for any CLJ project created by lein.
You do not need to do anything else to install the plugin because it will be automatically
downloaded from a remote repository the very first time you issue any lein task.
Install the java specific libs as local repository
--------------------------------------------------
If you followed the standard documentation for installing OpenCV on your computer, you should find
the following two libs under the directory where you built OpenCV:
- the build/bin/opencv-247.jar java lib
- the build/lib/libopencv_java247.dylib native lib (or .so in you built OpenCV a GNU/Linux OS)
They are the only opencv libs needed by the JVM to interact with OpenCV.
### Take apart the needed opencv libs
Create a new directory to store in the above two libs. Start by copying into it the opencv-247.jar
lib.
@code{.bash}
cd ~/opt
mkdir clj-opencv
cd clj-opencv
cp ~/opt/opencv/build/bin/opencv-247.jar .
@endcode
First lib done.
Now, to be able to add the libopencv_java247.dylib shared native lib to the local maven repository,
we first need to package it as a jar file.
The native lib has to be copied into a directories layout which mimics the names of your operating
system and architecture. I'm using a Mac OS X with a X86 64 bit architecture. So my layout will be
the following:
@code{.bash}
mkdir -p native/macosx/x86_64
@endcode
Copy into the x86_64 directory the libopencv_java247.dylib lib.
@code{.bash}
cp ~/opt/opencv/build/lib/libopencv_java247.dylib native/macosx/x86_64/
@endcode
If you're running OpenCV from a different OS/Architecture pair, here is a summary of the mapping you
can choose from.
@code{.bash}
OS
Mac OS X -> macosx
Windows -> windows
Linux -> linux
SunOS -> solaris
Architectures
amd64 -> x86_64
x86_64 -> x86_64
x86 -> x86
i386 -> x86
arm -> arm
sparc -> sparc
@endcode
### Package the native lib as a jar
Next you need to package the native lib in a jar file by using the jar command to create a new jar
file from a directory.
@code{.bash}
jar -cMf opencv-native-247.jar native
@endcode
Note that ehe M option instructs the jar command to not create a MANIFEST file for the artifact.
Your directories layout should look like the following:
@code{.bash}
tree
.
|__ native
| |__ macosx
| |__ x86_64
| |__ libopencv_java247.dylib
|
|__ opencv-247.jar
|__ opencv-native-247.jar
3 directories, 3 files
@endcode
### Locally install the jars
We are now ready to add the two jars as artifacts to the local maven repository with the help of the
lein-localrepo plugin.
@code{.bash}
lein localrepo install opencv-247.jar opencv/opencv 2.4.7
@endcode
Here the localrepo install task creates the 2.4.7. release of the opencv/opencv maven artifact from
the opencv-247.jar lib and then installs it into the local maven repository. The opencv/opencv
artifact will then be available to any maven compliant project (Leiningen is internally based on
maven).
Do the same thing with the native lib previously wrapped in a new jar file.
@code{.bash}
lein localrepo install opencv-native-247.jar opencv/opencv-native 2.4.7
@endcode
Note that the groupId, opencv, of the two artifacts is the same. We are now ready to create a new
CLJ project to start interacting with OpenCV.
### Create a project
Create a new CLJ project by using the lein new task from the terminal.
@code{.bash}
# cd in the directory where you work with your development projects (e.g. ~/devel)
lein new simple-sample
Generating a project called simple-sample based on the 'default' template.
To see other templates (app, lein plugin, etc), try `lein help new`.
@endcode
The above task creates the following simple-sample directories layout:
@code{.bash}
tree simple-sample/
simple-sample/
|__ LICENSE
|__ README.md
|__ doc
| |__ intro.md
|
|__ project.clj
|__ resources
|__ src
| |__ simple_sample
| |__ core.clj
|__ test
|__ simple_sample
|__ core_test.clj
6 directories, 6 files
@endcode
We need to add the two opencv artifacts as dependencies of the newly created project. Open the
project.clj and modify its dependencies section as follows:
@code{.bash}
(defproject simple-sample "0.1.0-SNAPSHOT"
description "FIXME: write description"
url "http://example.com/FIXME"
license {:name "Eclipse Public License"
url "http://www.eclipse.org/legal/epl-v10.html"}
dependencies [[org.clojure/clojure "1.5.1"]
[opencv/opencv "2.4.7"] ; added line
[opencv/opencv-native "2.4.7"]]) ;added line
@endcode
Note that The Clojure Programming Language is a jar artifact too. This is why Clojure is called an
hosted language.
To verify that everything went right issue the lein deps task. The very first time you run a lein
task it will take sometime to download all the required dependencies before executing the task
itself.
@code{.bash}
cd simple-sample
lein deps
...
@endcode
The deps task reads and merges from the project.clj and the \~/.lein/profiles.clj files all the
dependencies of the simple-sample project and verifies if they have already been cached in the local
maven repository. If the task returns without messages about not being able to retrieve the two new
artifacts your installation is correct, otherwise go back and double check that you did everything
right.
### REPLing with OpenCV
Now cd in the simple-sample directory and issue the following lein task:
@code{.bash}
cd simple-sample
lein repl
...
...
nREPL server started on port 50907 on host 127.0.0.1
REPL-y 0.3.0
Clojure 1.5.1
Docs: (doc function-name-here)
(find-doc "part-of-name-here")
Source: (source function-name-here)
Javadoc: (javadoc java-object-or-class-here)
Exit: Control+D or (exit) or (quit)
Results: Stored in vars *1, *2, *3, an exception in *e
user=>
@endcode
You can immediately interact with the REPL by issuing any CLJ expression to be evaluated.
@code{.clojure}
user=> (+ 41 1)
42
user=> (println "Hello, OpenCV!")
Hello, OpenCV!
nil
user=> (defn foo [] (str "bar"))
#'user/foo
user=> (foo)
"bar"
@endcode
When ran from the home directory of a lein based project, even if the lein repl task automatically
loads all the project dependencies, you still need to load the opencv native library to be able to
interact with the OpenCV.
@code{.clojure}
user=> (clojure.lang.RT/loadLibrary org.opencv.core.Core/NATIVE_LIBRARY_NAME)
nil
@endcode
Then you can start interacting with OpenCV by just referencing the fully qualified names of its
classes.
@note
[Here](https://docs.opencv.org/4.x/javadoc/index.html) you can find the full OpenCV Java API.
@code{.clojure}
user=> (org.opencv.core.Point. 0 0)
#<Point {0.0, 0.0}>
@endcode
Here we created a two dimensions opencv Point instance. Even if all the java packages included
within the java interface to OpenCV are immediately available from the CLJ REPL, it's very annoying
to prefix the Point. instance constructors with the fully qualified package name.
Fortunately CLJ offer a very easy way to overcome this annoyance by directly importing the Point
class.
@code{.clojure}
user=> (import 'org.opencv.core.Point)
org.opencv.core.Point
user=> (def p1 (Point. 0 0))
#'user/p1
user=> p1
#<Point {0.0, 0.0}>
user=> (def p2 (Point. 100 100))
#'user/p2
@endcode
We can even inspect the class of an instance and verify if the value of a symbol is an instance of a
Point java class.
@code{.clojure}
user=> (class p1)
org.opencv.core.Point
user=> (instance? org.opencv.core.Point p1)
true
@endcode
If we now want to use the opencv Rect class to create a rectangle, we again have to fully qualify
its constructor even if it leaves in the same org.opencv.core package of the Point class.
@code{.clojure}
user=> (org.opencv.core.Rect. p1 p2)
#<Rect {0, 0, 100x100}>
@endcode
Again, the CLJ importing facilities is very handy and let you to map more symbols in one shot.
@code{.clojure}
user=> (import '[org.opencv.core Point Rect Size])
org.opencv.core.Size
user=> (def r1 (Rect. p1 p2))
#'user/r1
user=> r1
#<Rect {0, 0, 100x100}>
user=> (class r1)
org.opencv.core.Rect
user=> (instance? org.opencv.core.Rect r1)
true
user=> (Size. 100 100)
#<Size 100x100>
user=> (def sq-100 (Size. 100 100))
#'user/sq-100
user=> (class sq-100)
org.opencv.core.Size
user=> (instance? org.opencv.core.Size sq-100)
true
@endcode
Obviously you can call methods on instances as well.
@code{.clojure}
user=> (.area r1)
10000.0
user=> (.area sq-100)
10000.0
@endcode
Or modify the value of a member field.
@code{.clojure}
user=> (set! (.x p1) 10)
10
user=> p1
#<Point {10.0, 0.0}>
user=> (set! (.width sq-100) 10)
10
user=> (set! (.height sq-100) 10)
10
user=> (.area sq-100)
100.0
@endcode
If you find yourself not remembering a OpenCV class behavior, the REPL gives you the opportunity to
easily search the corresponding javadoc documentation:
@code{.clojure}
user=> (javadoc Rect)
"http://www.google.com/search?btnI=I%27m%20Feeling%20Lucky&q=allinurl:org/opencv/core/Rect.html"
@endcode
### Mimic the OpenCV Java Tutorial Sample in the REPL
Let's now try to port to Clojure the @ref tutorial_java_dev_intro "OpenCV Java tutorial sample".
Instead of writing it in a source file we're going to evaluate it at the REPL.
Following is the original Java source code of the cited sample.
@code{.java}
import org.opencv.core.Mat;
import org.opencv.core.CvType;
import org.opencv.core.Scalar;
class SimpleSample {
static{ System.loadLibrary("opencv_java244"); }
public static void main(String[] args) {
Mat m = new Mat(5, 10, CvType.CV_8UC1, new Scalar(0));
System.out.println("OpenCV Mat: " + m);
Mat mr1 = m.row(1);
mr1.setTo(new Scalar(1));
Mat mc5 = m.col(5);
mc5.setTo(new Scalar(5));
System.out.println("OpenCV Mat data:\n" + m.dump());
}
}
@endcode
### Add injections to the project
Before start coding, we'd like to eliminate the boring need of interactively loading the native
opencv lib any time we start a new REPL to interact with it.
First, stop the REPL by evaluating the (exit) expression at the REPL prompt.
@code{.clojure}
user=> (exit)
Bye for now!
@endcode
Then open your project.clj file and edit it as follows:
@code{.clojure}
(defproject simple-sample "0.1.0-SNAPSHOT"
...
injections [(clojure.lang.RT/loadLibrary org.opencv.core.Core/NATIVE_LIBRARY_NAME)])
@endcode
Here we're saying to load the opencv native lib anytime we run the REPL in such a way that we have
not anymore to remember to manually do it.
Rerun the lein repl task
@code{.bash}
lein repl
nREPL server started on port 51645 on host 127.0.0.1
REPL-y 0.3.0
Clojure 1.5.1
Docs: (doc function-name-here)
(find-doc "part-of-name-here")
Source: (source function-name-here)
Javadoc: (javadoc java-object-or-class-here)
Exit: Control+D or (exit) or (quit)
Results: Stored in vars *1, *2, *3, an exception in *e
user=>
@endcode
Import the interested OpenCV java interfaces.
@code{.clojure}
user=> (import '[org.opencv.core Mat CvType Scalar])
org.opencv.core.Scalar
@endcode
We're going to mimic almost verbatim the original OpenCV java tutorial to:
- create a 5x10 matrix with all its elements initialized to 0
- change the value of every element of the second row to 1
- change the value of every element of the 6th column to 5
- print the content of the obtained matrix
@code{.clojure}
user=> (def m (Mat. 5 10 CvType/CV_8UC1 (Scalar. 0 0)))
#'user/m
user=> (def mr1 (.row m 1))
#'user/mr1
user=> (.setTo mr1 (Scalar. 1 0))
#<Mat Mat [ 1*10*CV_8UC1, isCont=true, isSubmat=true, nativeObj=0x7fc9dac49880, dataAddr=0x7fc9d9c98d5a ]>
user=> (def mc5 (.col m 5))
#'user/mc5
user=> (.setTo mc5 (Scalar. 5 0))
#<Mat Mat [ 5*1*CV_8UC1, isCont=false, isSubmat=true, nativeObj=0x7fc9d9c995a0, dataAddr=0x7fc9d9c98d55 ]>
user=> (println (.dump m))
[0, 0, 0, 0, 0, 5, 0, 0, 0, 0;
1, 1, 1, 1, 1, 5, 1, 1, 1, 1;
0, 0, 0, 0, 0, 5, 0, 0, 0, 0;
0, 0, 0, 0, 0, 5, 0, 0, 0, 0;
0, 0, 0, 0, 0, 5, 0, 0, 0, 0]
nil
@endcode
If you are accustomed to a functional language all those abused and mutating nouns are going to
irritate your preference for verbs. Even if the CLJ interop syntax is very handy and complete, there
is still an impedance mismatch between any OOP language and any FP language (bein Scala a mixed
paradigms programming language).
To exit the REPL type (exit), ctr-D or (quit) at the REPL prompt.
@code{.clojure}
user=> (exit)
Bye for now!
@endcode
### Interactively load and blur an image
In the next sample you will learn how to interactively load and blur and image from the REPL by
using the following OpenCV methods:
- the imread static method from the Highgui class to read an image from a file
- the imwrite static method from the Highgui class to write an image to a file
- the GaussianBlur static method from the Imgproc class to apply to blur the original image
We're also going to use the Mat class which is returned from the imread method and accepted as the
main argument to both the GaussianBlur and the imwrite methods.
### Add an image to the project
First we want to add an image file to a newly create directory for storing static resources of the
project.

@code{.bash}
mkdir -p resources/images
cp ~/opt/opencv/doc/tutorials/introduction/desktop_java/images/lena.png resource/images/
@endcode
### Read the image
Now launch the REPL as usual and start by importing all the OpenCV classes we're going to use:
@code{.clojure}
lein repl
nREPL server started on port 50624 on host 127.0.0.1
REPL-y 0.3.0
Clojure 1.5.1
Docs: (doc function-name-here)
(find-doc "part-of-name-here")
Source: (source function-name-here)
Javadoc: (javadoc java-object-or-class-here)
Exit: Control+D or (exit) or (quit)
Results: Stored in vars *1, *2, *3, an exception in *e
user=> (import '[org.opencv.core Mat Size CvType]
'[org.opencv.imgcodecs Imgcodecs]
'[org.opencv.imgproc Imgproc])
org.opencv.imgproc.Imgproc
@endcode
Now read the image from the resources/images/lena.png file.
@code{.clojure}
user=> (def lena (Highgui/imread "resources/images/lena.png"))
#'user/lena
user=> lena
#<Mat Mat [ 512*512*CV_8UC3, isCont=true, isSubmat=false, nativeObj=0x7f9ab3054c40, dataAddr=0x19fea9010 ]>
@endcode
As you see, by simply evaluating the lena symbol we know that lena.png is a 512x512 matrix of
CV_8UC3 elements type. Let's create a new Mat instance of the same dimensions and elements type.
@code{.clojure}
user=> (def blurred (Mat. 512 512 CvType/CV_8UC3))
#'user/blurred
user=>
@endcode
Now apply a GaussianBlur filter using lena as the source matrix and blurred as the destination
matrix.
@code{.clojure}
user=> (Imgproc/GaussianBlur lena blurred (Size. 5 5) 3 3)
nil
@endcode
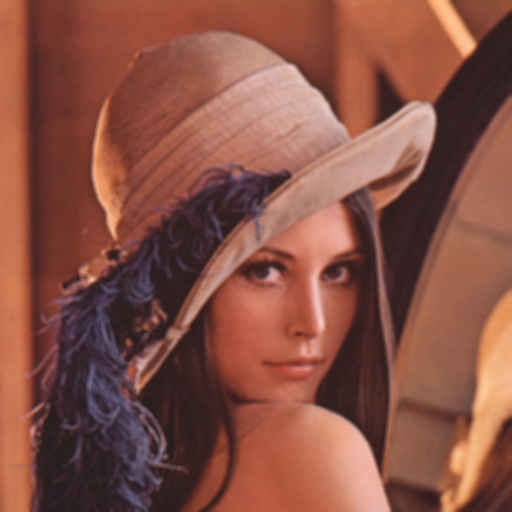
As a last step just save the blurred matrix in a new image file.
@code{.clojure}
user=> (Highgui/imwrite "resources/images/blurred.png" blurred)
true
user=> (exit)
Bye for now!
@endcode
Following is the new blurred image of Lena.
Next Steps
----------
This tutorial only introduces the very basic environment set up to be able to interact with OpenCV
in a CLJ REPL.
I recommend any Clojure newbie to read the [Clojure Java Interop
chapter](http://clojure.org/java_interop) to get all you need to know to interoperate with any plain
java lib that has not been wrapped in Clojure to make it usable in a more idiomatic and functional
way within Clojure.
The OpenCV Java API does not wrap the highgui module functionalities depending on Qt (e.g.
namedWindow and imshow. If you want to create windows and show images into them while interacting
with OpenCV from the REPL, at the moment you're left at your own. You could use Java Swing to fill
the gap.
### License
Copyright © 2013 Giacomo (Mimmo) Cosenza aka Magomimmo
Distributed under the BSD 3-clause License.
|
