1
2
3
4
5
6
7
8
9
10
11
12
13
14
15
16
17
18
19
20
21
22
23
24
25
26
27
28
29
30
31
32
33
34
35
36
37
38
39
40
41
42
43
44
45
46
47
48
49
50
51
52
53
54
55
56
57
58
59
60
61
62
63
64
65
66
67
68
69
70
71
72
73
74
75
76
77
78
79
80
81
82
83
84
85
86
87
88
89
90
91
92
93
94
95
96
97
98
99
100
101
102
103
104
105
106
107
108
109
110
111
112
113
114
115
116
117
118
119
120
121
122
123
124
125
126
127
128
129
130
131
132
133
134
135
136
137
138
139
140
141
142
143
144
145
146
147
148
149
150
151
152
153
154
155
156
157
158
159
160
161
162
163
164
165
166
167
168
169
170
171
172
173
174
175
176
177
178
179
180
181
182
183
184
185
186
187
188
189
190
191
192
193
194
195
196
197
198
199
200
201
202
203
204
205
206
207
208
209
210
211
212
213
214
215
216
217
218
219
220
|
SimpleSAMLphp Service Provider QuickStart
=========================================
<!--
This file is written in Markdown syntax.
For more information about how to use the Markdown syntax, read here:
http://daringfireball.net/projects/markdown/syntax
-->
<!-- {{TOC}} -->
This guide will describe how to configure SimpleSAMLphp as a service provider (SP). You should previously have installed SimpleSAMLphp as described in [the SimpleSAMLphp installation instructions](simplesamlphp-install).
Configuring the SP
------------------
The SP is configured by an entry in `config/authsources.php`.
This is a minimal `authsources.php` for a SP:
<?php
$config = array(
/* This is the name of this authentication source, and will be used to access it later. */
'default-sp' => array(
'saml:SP',
),
);
For more information about additional options available for the SP, see the [`saml:SP` reference](./saml:sp).
If you want mulitple Service Providers in the same site and installation, you can add more entries in the `authsources.php` configuration. If so remember to set the EntityID explicitly. Here is an example:
'sp1' => array(
'saml:SP',
'entityID' => 'https://sp1.example.org/',
),
'sp2' => array(
'saml:SP',
'entityID' => 'https://sp2.example.org/',
),
### Enabling a certificate for your Service Provider
Some Identity Providers / Federations may require that your Service Providers holds a certificate. If you enable a certificate for your Service Provider, it may be able to sign requests and response sent to the Identity Provider, as well as receiving encrypted responses.
Create a self-signed certificate in the `cert/` directory.
cd cert
openssl req -newkey rsa:2048 -new -x509 -days 3652 -nodes -out saml.crt -keyout saml.pem
Then edit your `authsources.php` entry, and add references to your certificate:
'default-sp' => array(
'saml:SP',
'privatekey' => 'saml.pem',
'certificate' => 'saml.crt',
),
Adding IdPs to the SP
---------------------
The service provider you are configuring needs to know about the identity providers you are going to connect to it. This is configured by metadata stored in `metadata/saml20-idp-remote.php` and `metadata/shib13-idp-remote.php`.
This is a minimal example of a `metadata/saml20-idp-remote.php` metadata file:
<?php
$metadata['https://openidp.feide.no'] = array(
'SingleSignOnService' => 'https://openidp.feide.no/simplesaml/saml2/idp/SSOService.php',
'SingleLogoutService' => 'https://openidp.feide.no/simplesaml/saml2/idp/SingleLogoutService.php',
'certFingerprint' => 'c9ed4dfb07caf13fc21e0fec1572047eb8a7a4cb',
);
For more information about available options in the idp-remote metadata files, see the [IdP remote reference](simplesamlphp-reference-idp-remote).
If you have the metadata of the remote IdP as an XML file, you can use the built-in XML to SimpleSAMLphp metadata converter, which by default is available as `/admin/metadata-converter.php` in your SimpleSAMLphp installation.
Note that the idp-remote file lists all IdPs you trust. You should remove all IdPs that you don't use.
Setting the default IdP
-----------------------
An option in the authentication source allows you to configure which IdP should be used.
This is the `idp` option.
<?php
$config = array(
'default-sp' => array(
'saml:SP',
/*
* The entity ID of the IdP this should SP should contact.
* Can be NULL/unset, in which case the user will be shown a list of available IdPs.
*/
'idp' => 'https://openidp.feide.no',
),
);
Exchange metadata with the IdP
------------------------------
If you do not have an IdP yourself, you could use the Feide OpenIdP to test your Service Provider.
The metadata for Feide OpenIdP is already included in the metadata distributed with SimpleSAMLphp.
In order to complete the connection between your SP and Feide OpenIdP, you must add the metadata for your SP to the IdP.
The metadata for your SP can be found on the `Federation`-tab.
Copy the SAML 2.0 XML Metadata document automatically generated by SimpleSAMLphp, and go to the OpenIdP Metadata Self-Service Registry:
* [Feide OpenIdP Metadata Self-Service Registry](https://openidp.feide.no/simplesaml/module.php/metaedit/index.php)
You need to login with an OpenIdP account to authenticate (you can create a new account if you do not have one already).
Next, click the link 'Add from SAML 2.0 XML metadata', and paste in your SAML 2.0 XML Metadata.
After clicking the 'Import metadata' button, you will be presented with a form where you can edit your metadata.
You can check that your metadata was parsed correctly by looking at the 'SAML 2.0' tab.
The textfields for AssertionConsumerService and SingleLogoutService should contain two URLs:
`AssertionConsumerService`
: `https://sp.example.org/simplesaml/module.php/saml/sp/saml2-acs.php/default-sp`
`SingleLogoutService`
: `https://sp.example.org/simplesaml/module.php/saml/sp/saml2-logout.php/default-sp`
After checking your metadata, give your SP a proper name and description and click 'save'.
The procedure for managing trust in federations differ, but the common part is that you would need to provide the *SAML 2.0 metadata
of your SP*, and register that with the federation administration.
Test the SP
-----------------------------
After the metadata is configured on the IdP, you should be able to test the configuration.
The installation page of SimpleSAMLphp has a link to test authentication sources.
When you click the link, you should receive a list of authentication sources, including the one you have created for the SP.
After you click the link for that authentication source, you will be redirected to the IdP.
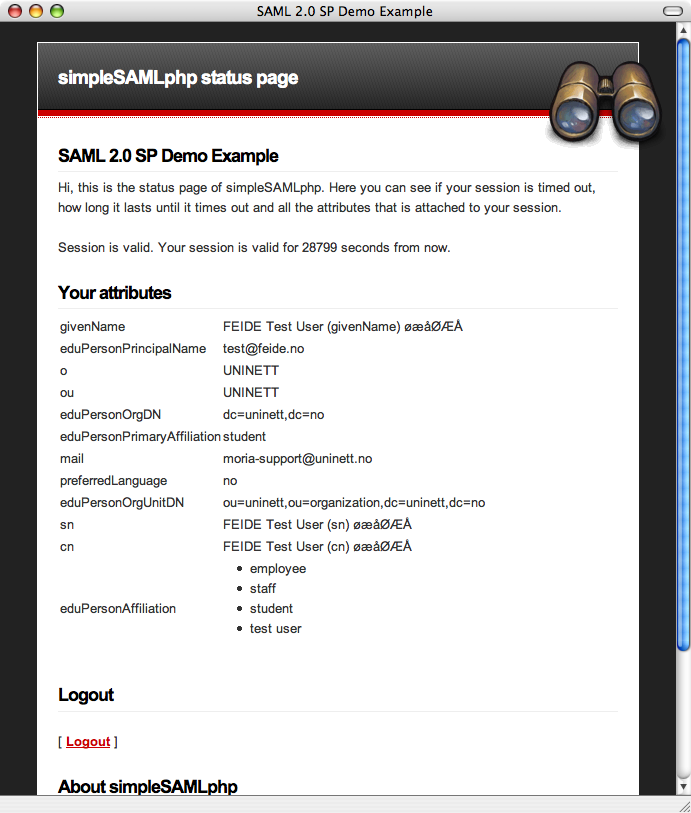
After entering your credentials, you should be redirected back to the test page.
The test page should contain a list of your attributes:
For a better looking, more advanced Discovery Service with tabs and live search, you may want to use the `discopower` module
in SimpleSAMLphp. Take a look at the following blog entry for more information:
* [Blog entry about the DiscoPower module](https://rnd.feide.no/content/improved-discovery-service-live-search)
Integrating authentication with your own application
----------------------------------------------------
The API is documented in [the SP API reference](simplesamlphp-sp-api).
For those web resources you want to protect, you must add a few
lines of PHP code:
- Register the SimpleSAMLphp classes with the PHP autoloader.
-
Require authentication of the user for those places it is required.
-
Access the users attributes.
Example code:
We start off with loading a file which registers the SimpleSAMLphp classes with the autoloader.
require_once('../../lib/_autoload.php');
We select our authentication source:
$as = new SimpleSAML_Auth_Simple('default-sp');
We then require authentication:
$as->requireAuth();
And print the attributes:
$attributes = $as->getAttributes();
print_r($attributes);
Each attribute name can be used as an index into $attributes to obtain the value. Every attribute value is an array - a single-valued attribute is an array of a single element.
We can also request authentication with a specific IdP:
$as->login(array(
'saml:idp' => 'https://idp.example.org/',
));
Other options are also available.
Take a look in the documentation for the [SP module](./saml:sp) for a list of all parameters.
If we are using PHP sessions in SimpleSAMLphp and in the application we are protecting, SimpleSAMLphp will close any
existing session when invoked for the first time, and its own session will prevail afterwards. If you want to restore
your own session after calling SimpleSAMLphp, you can do so by cleaning up the session like this:
$session = SimpleSAML_Session::getSessionFromRequest();
$session->cleanup();
If you don't cleanup SimpleSAMLphp's session and try to use $_SESSION afterwards, you won't be using your own session
and all your data is likely to get lost or inaccessible.
Support
-------
If you need help to make this work, or want to discuss SimpleSAMLphp with other users of the software, you are fortunate: Around SimpleSAMLphp there is a great Open source community, and you are welcome to join! The forums are open for you to ask questions, contribute answers other further questions, request improvements or contribute with code or plugins of your own.
- [SimpleSAMLphp homepage](https://simplesamlphp.org)
- [List of all available SimpleSAMLphp documentation](https://simplesamlphp.org/docs/)
- [Join the SimpleSAMLphp user's mailing list](https://simplesamlphp.org/lists)
|
