1
2
3
4
5
6
7
8
9
10
11
12
13
14
15
16
17
18
19
20
21
22
23
24
25
26
27
28
29
30
31
32
33
34
35
36
37
38
39
40
41
42
43
44
45
46
47
48
49
50
51
52
53
54
55
56
57
58
59
60
61
62
63
64
65
66
67
68
69
70
71
72
73
74
75
76
77
78
79
80
81
82
83
84
85
86
87
88
89
90
91
92
93
94
95
96
97
98
99
100
101
102
103
104
105
106
107
108
109
110
111
112
113
114
115
116
117
118
119
120
121
122
123
124
125
126
127
128
129
130
131
132
133
134
135
136
137
138
139
140
141
142
143
144
145
146
147
148
149
150
151
152
153
154
155
156
157
158
159
160
161
162
163
164
165
166
167
168
169
170
171
172
173
174
175
176
177
178
179
180
181
182
183
184
185
186
187
188
189
190
191
192
193
194
195
196
197
198
199
200
201
202
203
204
205
206
207
208
209
210
211
212
213
214
215
216
217
218
219
220
221
222
223
224
225
226
227
228
229
230
231
232
233
234
235
236
237
238
239
240
241
242
243
244
245
246
247
248
249
250
251
252
253
254
255
256
257
258
259
260
261
262
263
264
265
266
267
268
269
270
271
272
273
274
275
276
277
278
279
280
281
282
283
284
285
286
287
288
289
290
291
292
293
294
295
296
297
298
299
300
301
302
303
304
305
306
307
|
[](https://en.wikipedia.org/wiki/MIT_License)
[](https://anaconda.org/conda-forge/vedo)
[](https://repology.org/project/vedo/versions)
[](https://doi.org/10.5281/zenodo.4587871)
A python module for scientific analysis of 3D objects and
point clouds based on [VTK](https://www.vtk.org/) and [Numpy](http://www.numpy.org/).
Check out the [**GitHub repository**](https://github.com/marcomusy/vedo)
and the [**vedo main page here**](https://vedo.embl.es).
Find at this [link](https://vedo.embl.es/autodocs/v2023.4.7/vedo.html) the documentation for the older version v2023.4.7.
## Install and Test
```bash
pip install vedo
# Or, install the latest development version with:
pip install -U git+https://github.com/marcomusy/vedo.git
```
Then
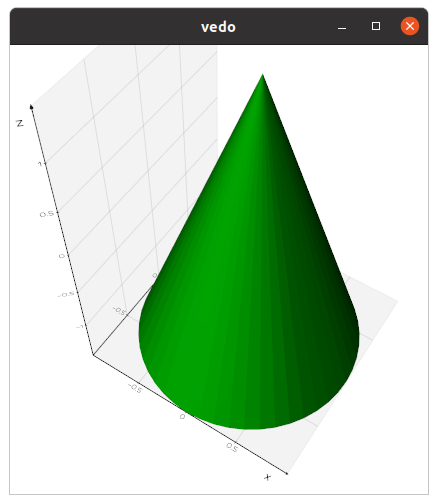
```python
import vedo
vedo.Cone().show(axes=1).close()
```
## Command Line Interface
The library includes a **C**ommand **L**ine **I**nterface.
Type for example in your terminal:
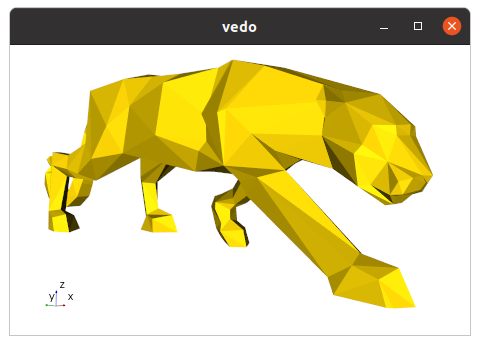
```bash
vedo --help
vedo https://vedo.embl.es/examples/data/panther.stl.gz
```
Pressing `h` will then show a number of options to interact with your 3D scene:
```
i print info about the last clicked object
I print color of the pixel under the mouse
Y show the pipeline for this object as a graph
<- -> use arrows to reduce/increase opacity
x toggle mesh visibility
w toggle wireframe/surface style
l toggle surface edges visibility
p/P hide surface faces and show only points
1-3 cycle surface color (2=light, 3=dark)
4 cycle color map (press shift-4 to go back)
5-6 cycle point-cell arrays (shift to go back)
7-8 cycle background and gradient color
09+- cycle axes styles (on keypad, or press +/-)
k cycle available lighting styles
K toggle shading as flat or phong
A toggle anti-aliasing
D toggle depth-peeling (for transparencies)
U toggle perspective/parallel projection
o/O toggle extra light to scene and rotate it
a toggle interaction to Actor Mode
n toggle surface normals
r reset camera position
R reset camera to the closest orthogonal view
. fly camera to the last clicked point
C print the current camera parameters state
X invoke a cutter widget tool
S save a screenshot of the current scene
E/F export 3D scene to numpy file or X3D
q return control to python script
Esc abort execution and exit python kernel
```
### Some useful bash aliases
```bash
alias vr='vedo --run ' # to search and run examples by name
alias vs='vedo --search ' # to search for a string in examples
alias ve='vedo --eog ' # to view single and multiple images
```
## Tutorials
You are welcome to ask specific questions on the
[**image.sc**](https://forum.image.sc) forum,
post a [**github issue**](https://github.com/marcomusy/vedo/issues)
or search the [**examples gallery**](https://vedo.embl.es/#gallery)
for some relevant example.
You can also find online tutorials at:
- [Vedo tutorial for the EMBL Python User Group](https://github.com/marcomusy/vedo-epug-tutorial) with [slides](https://github.com/marcomusy/vedo-epug-tutorial/blob/main/vedo-epug-seminar.pdf) by M. Musy (EMBL).
- [Summer School on Computational Modelling of Multicellular Systems](https://github.com/LauAvinyo/vedo-embo-course) with [slides](https://github.com/LauAvinyo/vedo-embo-course/blob/main/vedo-embo-presentation.pdf) by Laura Avinyo (EMBL).
- Youtube video tutorials by [M. El Amine](https://github.com/amine0110/pycad):
- [Visualizing Multiple 3D Objects in Medical Imaging](https://www.youtube.com/watch?v=LVoj3poN2WI)
- [Capture 3D Mesh Screenshots in Medical Imaging](https://www.youtube.com/watch?v=8Qn14WMUamA)
- [Slice 'n Dice: Precision 3D Mesh Cutting](https://www.youtube.com/watch?v=dmXC078ZOR4&t=195s)
- [3D Visualization of STL Files](https://www.youtube.com/watch?v=llq9-oJXepQ)
- [Creating an interactive 3D geological model](https://www.youtube.com/watch?v=raiIft8VeRU&t=1s) by A. Pollack (SCRF). See a more updated example
[here](https://github.com/marcomusy/vedo/blob/master/examples/advanced/geological_model.py).
- ["vedo", a python module for scientific analysis and visualization of 3D data](https://www.youtube.com/watch?v=MhIoetdxwc0&t=39s), I2K Conference, by M. Musy (EMBL).
## Export a 3D scene to file
You can export it to a vedo file, which is actually a normal `numpy` file by pressing `E`
in your 3D scene, the you can interact with it normally using for example the key bindings shown above.
Another way is to export to a template html web page by pressing `F` using the `x3d` backend.
You can also export it programmatically in `k3d` format from a jupyter notebook.
## File format conversion
You can convert on the fly a file (or multiple files) to a different format with
```bash
vedo --convert bunny.obj --to ply
```
## Running in a Jupyter Notebook
To use in jupyter notebooks use the syntax `vedo.settings.default_backend= '...' ` the supported backend for visualization are:
- `2d`, the default a static image is generated.
- `vtk`, in this case a normal graphics rendering window will pop up.
- [k3d](https://github.com/K3D-tools/K3D-jupyter) use with `pip install k3d`
- [ipyvtklink](https://github.com/Kitware/ipyvtklink) (allows interaction with the scene).
- [trame](https://www.kitware.com/trame-visual-analytics-everywhere/)
Check for more examples in
[repository](https://github.com/marcomusy/vedo/tree/master/examples/notebooks).
### Running on Google Colab
Start your notebook with:
```python
import vedo
vedo.settings.init_colab()
```
Then test it with:
```python
import vedo
print("vedo", vedo.__version__)
sphere = vedo.Sphere().linewidth(1)
plt = vedo.Plotter()
plt += sphere
plt.show(axes=1, viewup='z', zoom=1.5)
```
## Running on a Server
- Install `libgl1-mesa` and `xvfb` on your server:
```bash
sudo apt install libgl1-mesa-glx libgl1-mesa-dev xvfb
pip install vedo
```
- Execute on startup:
```bash
set -x
export DISPLAY=:99.0
which Xvfb
Xvfb :99 -screen 0 1024x768x24 > /dev/null 2>&1 &
sleep 3
set +x
exec "$@"
```
- You can save the above code above as `/etc/rc.local` and use `chmod +x` to make it executable.
It may throw an error during startup. Then test it with, e.g.:
```python
import vedo
plt = vedo.Plotter(offscreen=True, size=(500,500))
plt.show(vedo.Cube()).screenshot('mycube.png').close()
```
## Running in a Docker container
You need to set everything up for offscreen rendering: there are two main ingredients
- `vedo` should be set to render in offscreen mode
- guest OS in the docker container needs the relevant libraries installed
(in this example we need the Mesa openGL and GLX extensions, and Xvfb to act as a virtual screen.
It's maybe also possible to use OSMesa offscreen driver directly, but that requires a custom
build of VTK).
- Create a `Dockerfile`:
```bash
FROM python:3.8-slim-bullseye
RUN apt-get update -y \
&& apt-get install libgl1-mesa-dev libgl1-mesa-glx xvfb -y --no-install-recommends \
&& apt-get purge -y --auto-remove -o APT::AutoRemove::RecommendsImportant=false \
&& rm -rf /var/lib/apt/lists/*
RUN pip install vedo && rm -rf $(pip cache dir)
RUN mkdir -p /app/data
WORKDIR /app/
COPY test.py set_xvfb.sh /app/
ENTRYPOINT ["/app/set_xvfb.sh"]
```
- `set_xvfb.sh`:
```bash
#!/bin/bash
set -x
export DISPLAY=:99.0
Xvfb :99 -screen 0 1024x768x24 > /dev/null 2>&1 &
#sleep 3
set +x
exec "$@"
```
- `test.py`:
```python
from vedo import Sphere, Plotter, settings
sph = Sphere(pos=[-5, 0, 0], c="r")
plt = Plotter(interactive=False, offscreen=True)
plt.show(sph)
plt.screenshot("./data/out.png", scale=2).close()
```
Then you can
1. `$ docker build -t vedo-test-local .`
2. `$ docker run --rm -v /some/path/output:/app/data vedo-test-local python test.py` (directory `/some/path/output` needs to exist)
3. There should be an `out.png` file in the output directory.
## Generate a single executable file
You can use [pyinstaller](https://pyinstaller.readthedocs.io/en/stable/)
to generate a single, portable, executable file for different platforms.
Write a file `myscript.spec` as:
```python
# -*- mode: python ; coding: utf-8 -*-
#
import os
import sys
sys.setrecursionlimit(sys.getrecursionlimit() * 5)
from vedo import installdir as vedo_installdir
vedo_fontsdir = os.path.join(vedo_installdir, 'fonts')
print('vedo installation is in', vedo_installdir)
print('fonts are in', vedo_fontsdir)
block_cipher = None
added_files = [
(os.path.join('tuning','*'), 'tuning'),
(os.path.join(vedo_fontsdir,'*'), os.path.join('vedo','fonts')),
]
a = Analysis(['myscript.py'],
pathex=[],
binaries=[],
hiddenimports=[
'vtkmodules',
'vtkmodules.all',
'vtkmodules.util',
'vtkmodules.util.numpy_support',
'vtkmodules.qt.QVTKRenderWindowInteractor',
],
datas = added_files,
hookspath=[],
hooksconfig={},
runtime_hooks=[],
excludes=[],
win_no_prefer_redirects=False,
win_private_assemblies=False,
cipher=block_cipher,
noarchive=False)
pyz = PYZ(a.pure, a.zipped_data,
cipher=block_cipher)
exe = EXE(pyz,
a.scripts,
a.binaries,
a.zipfiles,
a.datas,
[],
name='my_program_name',
debug=False,
bootloader_ignore_signals=False,
strip=False,
upx=True,
upx_exclude=[],
runtime_tmpdir=None,
console=True,
disable_windowed_traceback=False,
target_arch=None,
codesign_identity=None,
entitlements_file=None)
```
then run it with
```bash
pyinstaller myscript.spec
```
See also an example [here](https://github.com/marcomusy/welsh_embryo_stager/blob/main/stager.spec).
If you get an [error message](https://github.com/marcomusy/vedo/discussions/820) related to a font which is not shipped with the vedo library you will need to copy the `.npz` and `.ttf` files to `vedo/fonts` (where all the other fonts are) and reinstall vedo.
Then add in your script `settings.font_parameters["FONTNAME"]["islocal"] = True`.
|
